Suggestions

if this can help you, my non-blocking code

/***************** Library ESP and Blynk *****************/
#define BLYNK_PRINT Serial
#include <ESP8266WiFi.h>
#include <BlynkSimpleEsp8266.h>

/***************** Library for OTA *****************/
#include <WiFiUdp.h>  // For OTA
#include <ArduinoOTA.h>  // For OTA
#include <ESP8266mDNS.h>

/***************** Library for real-time clock *****************/
#include <TimeLib.h>
#include <WidgetRTC.h>

BlynkTimer timer;
WidgetRTC rtc;

/*************** Server *********************/
char auth[] = "xxxxxxxxxxxxx";
char ssid[] = "xxxxxxxxxxxxxxxx";
char pass[] = "xxxxxxxxxxxxxxxxxxx";
char server[] = "192, 168, 0, 1";
IPAddress arduino_ip ( 192,  168,   0,  56);
IPAddress dns_ip     (  8,   8,   8,   8);
IPAddress gateway_ip ( 192,  168,   0,   254);
IPAddress subnet_mask(255, 255, 255,   0);


/*************** 4 Relays *********************/
int relay1 = 5;
int relay2 = 4;
int relay3 = 16;
int relay4 = 2;
int ON =0;
int OFF = 1;
int RelayBTN1 = 0;
int RelayBTN2 = 0;
int RelayBTN3 = 0;
int RelayBTN4 = 0;

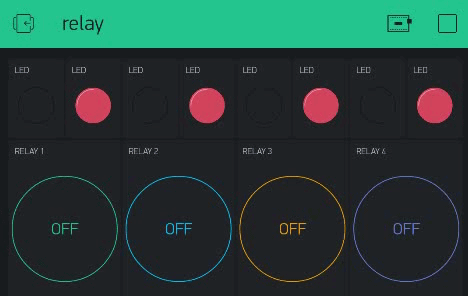
/*************** LEDS *********************/
WidgetLED led1(10); //virtual led
WidgetLED led2(11); //virtual led
WidgetLED led3(12); //virtual led
WidgetLED led4(13); //virtual
WidgetLED led5(14); //virtual
WidgetLED led6(15); //virtual
WidgetLED led7(16); //virtual
WidgetLED led8(17); //virtual

/*************** Setup *********************/
void setup()
{
  Serial.begin(115200);
  WiFi.config(arduino_ip, gateway_ip, subnet_mask);
  Blynk.begin(auth, ssid, pass, IPAddress(192, 168, 0, 1), 8088);
  //Blynk.begin(auth, ssid, pass, IPAddress(192, 168, 0, 1), 8442);

  /************************ OTA ***************/
  ArduinoOTA.setHostname("Nodemcu02"); //OTA Set the name of the network port
  ArduinoOTA.setPassword((const char *)"0000"); //OTA Set access password for remote firmware
  ArduinoOTA.begin(); //Initialize OTA
  Serial.println("Ready");
  Serial.print("IP address: ");
  Serial.println(WiFi.localIP());

  pinMode(relay1, OUTPUT);
  pinMode(relay2, OUTPUT);
  pinMode(relay3, OUTPUT);
  pinMode(relay4, OUTPUT);
}

/*************** buttons *********************/
BLYNK_WRITE(V1)
{
  RelayBTN1 = param.asInt(); 
  if (RelayBTN1 == true) {
    digitalWrite(relay1, ON);
    Serial.println("relay1 on");
    led1.on();
    led2.off();

  }
  else {
    digitalWrite(relay1,OFF);
    Serial.println("relay1 off");
    led1.off();
    led2.on();
  }
}

BLYNK_WRITE(V2)
{
  RelayBTN2 = param.asInt();
  if (RelayBTN2 == true) {
    digitalWrite(relay2,ON);
    Serial.println("relay2 on");
    led3.on();
    led4.off();

  }
  else {
    digitalWrite(relay2,OFF);
    Serial.println("relay2 off");
    led3.off();
    led4.on();
  }
}

BLYNK_WRITE(V3)
{
  RelayBTN3 = param.asInt(); 
  if (RelayBTN3 == true) {
    digitalWrite(relay3,ON);
    Serial.println("relay3 on");
    led5.on();
    led6.off();

  }
  else {
    digitalWrite(relay3,OFF);
    Serial.println("relay3 off");
    led5.off();
    led6.on();
  }
}

BLYNK_WRITE(V4)
{
  RelayBTN4 = param.asInt(); 
  if (RelayBTN4 == true) {
    digitalWrite(relay4,ON);
    Serial.println("relay4 on");
    led7.on();
    led8.off();
  }
  else {
    digitalWrite(relay4,OFF);
    Serial.println("relay4 off");
    led7.off();
    led8.on();
  }
}


void loop() {
  ArduinoOTA.handle();  // For OTA
  Blynk.run();
  timer.run();
  ESP.wdtFeed();
}

Video_2018-04-21_095702

1 Like

Thanks, Iā€™ll take a look later ā€¦

1 Like

Buttons are in switch mode :wink:

1 Like

To try and make @wanek array thing easier I used part of @Blynk_Coeur code, only 1 relay, 1 button and 2 LEDā€™s. The relay works as expected from the button in the Blynk app. But I canā€™t figure out whats stopping the LEDā€™s in the app switching when the button is pressed. LED(10) is red when the button is off as I wanted it to be but LED(11) doesnā€™t turn green when the button is pressed? :frowning:

Iā€™m convinced its related to this:

But canā€™t figure it out. Can someone please point me in right direction. :pray:

/***************** Library ESP and Blynk *****************/
#define BLYNK_PRINT Serial
#include <ESP8266WiFi.h>
#include <BlynkSimpleEsp8266.h>

#include "credentials.h"

BlynkTimer timer;

int count = 0;

/*************** 1 Relay *********************/
int relay1 = 14;
int ON = 0;
int OFF = 1;
int RelayBTN1 = 0;

/*************** 2 LEDS *********************/
WidgetLED led[] = {10, 11};

/*************** Setup *********************/
void setup()
{
  Serial.begin(115200);
  Blynk.begin(auth, ssid, pass, server, 8080);

  pinMode(relay1, OUTPUT);
}

/*************** 1 Virtual Buttons *********************/
BLYNK_WRITE(V1) {
  for (count = 0; count < 1; count++) {
    RelayBTN1 = param.asInt();
    if (RelayBTN1 == true) {
      digitalWrite(relay1, ON);
      led[count].on();
      led[count].off();
    }

    else {
      digitalWrite(relay1, OFF);
      led[count].off();
      led[count].on();
    }
  }
}
void loop() {
  Blynk.run();
  timer.run();
}

@Shadeyman
I donā€™t understand why do you use for next statements ?

when count = 0, you have led[0] , and led[1] off and on when count = 1

never led[10] , led [11]

try this

led[count+10].on();
led[count+11].off();

do you need to blink leds ? if yes it is not the good way

@Blynk_Coeur
Iā€™m trying to learn how to use an ā€œArrayā€, like @wanek had previously suggested. As I find them a little complicated I thought using only 1 relay, 1 button and 2 LEDā€™s in the Array would simplify things for me. As you can see, it didnā€™t work out as Iā€™d planned, Iā€™m still confused ā€¦ :exploding_head:

EDIT.

How do I correct this ?

Like this?

led[count+10].on();
led[count+11].off();

yes

1 Like

This array/count thing has me beat. Iā€™m close but no cigar ā€¦

1 Like


:wink:
Principle is the same even if java

2 Likes

So this is where Iā€™m at, ā€œFor Dummiesā€.
I shall now find a quiet corner to sit my dumb ass down and continue reading. :wink:

1 Like

just trying to write ā€œrandomā€ code until it works is not the good way to go.

read and understand the official docs, do some dedicated exercise with arrays, than you will see what is wrong with your current code. you have to invest some patience and time to learn the new stuff.

true, except the last point, with length:

afaik, one canā€™t interrogate the length of an array in c++.

1 Like

I didnā€™t think the 1 relay, 1 button and 2 LEDā€™s was random, hoped it was a simple exercise with an array. Turned out to not be so simple, for me that is.

I can make the fountain project without using arrays, I doubt the code will be as clean as it could be but it will work, and Iā€™ll improve it as I learn more.

youā€™re right, sorry for that expression.
if you still trying, post the last code version and we will figure it out.

1 Like

@wanek
I was at work all day yesterday, being in the middle of a large building site its not easy to concentrate. Did my best but this was as far as I got:

#define BLYNK_PRINT Serial
#include <ESP8266WiFi.h>
#include <BlynkSimpleEsp8266.h>

#include "credentials.h"

BlynkTimer timer;

int count = 0;

/*************** 1 Relay *********************/
int relay1 = 14;
int ON = 0;
int OFF = 1;
int RelayBTN1 = 0;

/*************** 2 LEDS *********************/
WidgetLED led[] = {10, 11};

/*************** Setup *********************/
void setup()
{
  Serial.begin(115200);
  Blynk.begin(auth, ssid, pass, server, 8080);

  pinMode(relay1, OUTPUT);
}

/*************** 1 Virtual Button *********************/
BLYNK_WRITE(V1) {
  
  for (count = 0; count < 1; count++) {
    RelayBTN1 = param.asInt();

    if (RelayBTN1 == true) {
      digitalWrite(relay1, ON);
      led[count].on();
      led[count].off();
    }
    else {
      digitalWrite(relay1, OFF);
      led[count].off();
      led[count].on();
    }
  }
}

void loop() {
  Blynk.run();
  timer.run();
}

This was the result.

Itā€™s quite difficult to see whatā€™s happening in the video. I can hear the relay clicking in and out, but the autoexposure settings in the camera are confusing what is happening with the lights going on and off.

Pete.

@PeteKnight
Yes Pete, not the best footage.
The relay turned on and off perfectly when I pressed the button.
The real LED light on my bench turned on and off as it should as the relay opened and closed(it also confuse the hell out of the camera on my phone, sorry).
The red ā€œoffā€ LED in the Blynk app also worked as it should.

The only thing that didnā€™t work was the ā€œonā€ LED in the app. Everything else worked as it should ā€¦

So the LED widget is doing the opposite of the light and physical LED - is that correct?

I donā€™t get why youā€™re sending an on and off immediately after each other in this bit of code.

Pete.

must be

if (RelayBTN1 == true) {
      digitalWrite(relay1, ON);
      led[count+10].on();
      led[count+11].off();
    }
    else {
      digitalWrite(relay1, OFF);
      led[count+10].off();
      led[count+11].on();

count only ever becomes 0, never 1 :slight_smile: since itā€™s less than 1 for the condition.
Make it <2 or <=1

1 Like