I have to say that you’re making life unnecessarily difficult for yourself by using an Arduino Pro Mini and ESP-01 together. It’s much easier to use a fully-fledged ESP8266 to do everything.
This has a few advantages:
- Lower cost
- Lower component count
- Easier to support/debug
- Supports OTA Updates
- Supports 1024 levels of PWM output
This is what my RGB controllers look like:
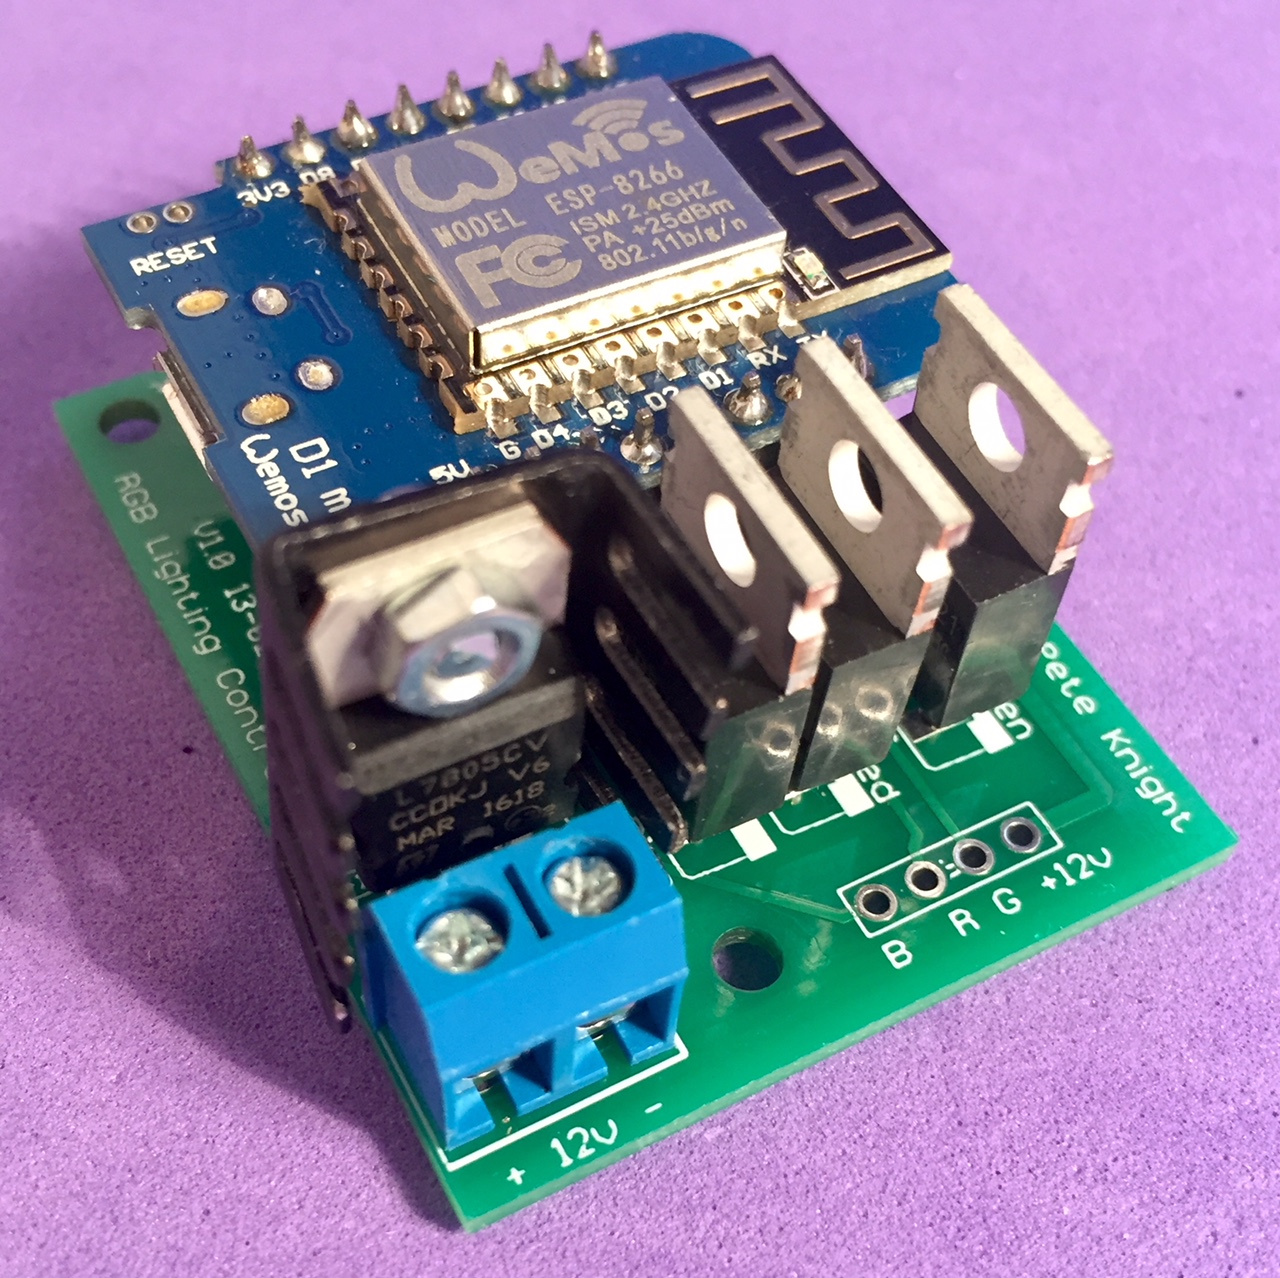
This is basically this circuit from Adafruit but using a Wemos D1 Mini instead of the Arduino Uno and with the addition of an on-board voltage regulator and smoothing capacitor:
Regardless of which circuit you use, I’d recommend the following:
- Add some mounting holes to your PCB so that its easier to box-up
- Go for wider tracks on the bits of the circuit that will be handling the current of the RGB strip
- Allow space for a heatsink on the voltage regulator
- Add plenty of screen printed info, you’ll thank yourself for this later
- Don’t be tempted to do a ‘copper pour’, the groundplane that it produces could block the Wi-Fi signals to the ESP
Pete.