Here you go…
/**************************************************************
* Blynk is a platform with iOS and Android apps to control
* Arduino, Raspberry Pi and the likes over the Internet.
* You can easily build graphic interfaces for all your
* projects by simply dragging and dropping widgets.
*
* Downloads, docs, tutorials: http://www.blynk.cc
* Blynk community: http://community.blynk.cc
* Social networks: http://www.fb.com/blynkapp
* http://twitter.com/blynk_app
*
* Blynk library is licensed under MIT license
* This example code is in public domain.
*
**************************************************************
* This example runs directly on ESP8266 chip.
*
* You need to install this for ESP8266 development:
* https://github.com/esp8266/Arduino
*
* Please be sure to select the right ESP8266 module
* in the Tools -> Board menu!
*
* Change WiFi ssid, pass, and Blynk auth token to run :)
*
**************************************************************/
//28/10/2016 at 1.45pm
#define BLYNK_PRINT Serial // Comment this out to disable prints and save space
#include <ESP8266WiFi.h>
#include <WiFiClient.h>
#include <ESP8266WebServer.h>
#include <ESP8266mDNS.h>
#include <ESP8266HTTPUpdateServer.h>
#include <RCSwitch.h>
#include <BlynkSimpleEsp8266.h>
#include <SimpleTimer.h>
#include <Wire.h>
#include <BaroSensor.h>
#include "DHT.h"
WidgetLED led(V1);
WidgetLCD lcd(V2);
WidgetLCD lcd1(V14);
#define DHTPIN 10
#define DHTTYPE DHT22
int reedSwitch = 12; // Reed Pin
int lightReading;
float light;
float husl = 50.00; //Every 10 meters corresponds to 1.2 hPa pressure change at sea level.
//This station is 433.42 above sea level so therefore add 52.01 hPa to reading then minus 2.01 to calibrate correctly
long rssi;
// You should get Auth Token in the Blynk App.
// Go to the Project Settings (nut icon).
char auth[] = "xxxxxxxxxxxxxx";
String mymin = " minutes";
const char* host = "esp8266-webupdate";
// Your WiFi credentials.
// Set password to "" for open networks.
char ssid[] = "xxxxxxxxx";
char pass[] = "xxxxxxxxxxx";
RCSwitch mySwitch = RCSwitch();
DHT dht(DHTPIN,DHTTYPE,11);
SimpleTimer timer;
ESP8266WebServer httpServer(80);
ESP8266HTTPUpdateServer httpUpdater;
void setup()
{
WiFi.begin(ssid, pass);
Blynk.begin(auth, ssid, pass);
while (Blynk.connect() == false) {
// Wait until connected
}
pinMode(reedSwitch,INPUT); // Garage Door Sensor Switch. Add External Pullup 1.5k OHM
Serial.begin(9600);
Wire.begin(2,14);
BaroSensor.begin();
dht.begin();
mySwitch.enableTransmit(0); // Transmitter is connected to ESP8266 Pin #0
MDNS.begin(host);
httpUpdater.setup(&httpServer);
httpServer.begin();
MDNS.addService("http", "tcp", 80);
Serial.printf("HTTPUpdateServer ready! Open http://%s.local/update in your browser\n", host);
timer.setInterval(10000L, sendAllData);// Here you set interval (10sec) and which function to call
timer.setInterval(1000L,garage);
timer.setInterval(1000L, sendUptime); // Here you set interval (1sec) and which function to call
}
void sendAllData()
{
float t = BaroSensor.getTemperature();
float pr = BaroSensor.getPressure();
float p = pr + husl; //adjust barometer for height above sea level
float h = dht.readHumidity();
float f = dht.readTemperature();
lightReading = analogRead(A0);
lightReading = map(lightReading,0,1023,0,100); //Set the light reading to a pecentage of 100 with a 100% being full sun
if (isnan(h) || isnan(f))
{
Serial.println("Failed to read from DHT sensor!");
return;
}
if(!BaroSensor.isOK())
{
Serial.print("Sensor not Found/OK. Error: ");
Serial.println(BaroSensor.getError());
BaroSensor.begin(); // Try to reinitialise the sensor if we can
}
else
{
Serial.print("Temperature: ");
Serial.print(f);
Serial.print("'C\t");
Serial.print(" Pressure: ");
Serial.print(p);
Serial.println(" hPa");
Serial.print("Humidity: ");
Serial.print(h);
Serial.print("%\t");
Serial.print(" Light: ");
Serial.println(lightReading);
Blynk.virtualWrite(V16,p);
Blynk.virtualWrite(V13,lightReading );
Blynk.virtualWrite(V10,f);
Blynk.virtualWrite(V11,h);
}
}
void sendUptime()
{
// This function sends Arduino up time every 1 second to Virtual Pin (V5)
// In the app, Widget's reading frequency should be set to PUSH
// You can send anything with any interval using this construction
// Don't send more that 10 values per second
Blynk.virtualWrite(V5, millis() / 1000);
lcd.print(0,0,"Time connected");
lcd.print(0,1, millis()/1000/60 + mymin);
if (led.getValue()) {
led.off();
}
else {
led.on();
}
}
void garage(){
int StatusSwitch = digitalRead(reedSwitch);
if (StatusSwitch == HIGH)
{
Serial.println("Door is closed!");
lcd1.print(0,0, "Garage door");
lcd1.print(0,1, "is closed");
// led2.off();
}
else //if input is low (0), then door is open
{
Serial.println("Door is open!!");
// Blynk.virtualWrite(V21,"open!!");
lcd1.print(0,0, "Garage door");
lcd1.print(0,1, "is open!!");
// led2.on();
}
}
BLYNK_WRITE(V22)
{
rssi=WiFi.RSSI(); // This fn displays the Wifi strength when a button is pressed from the Blynk App
int pinData = param.asInt();
if(pinData==1)
{
lcd.clear();
lcd.print(0 ,0,"Wifi Strength");
lcd.print(0 ,1,rssi);
}
}
bool isFirstConnect = true; // Keep this flag not to re-sync on every reconnection
// This function will run every time Blynk connection is established
BLYNK_CONNECTED()
{
if (isFirstConnect)
{
// Request Blynk server to re-send latest values for all pins
// Blynk.syncAll();
// You can also update an individual Virtual pin like this:
Blynk.syncVirtual(V10);
Blynk.syncVirtual(V11);
Blynk.syncVirtual(V13);
Blynk.syncVirtual(V16);
isFirstConnect = false;
}
}
void loop()
{
  Blynk.run();
  timer.run();
  httpServer.handleClient();
}

/*Remote control of switches
-------------------------------------------------*/

  BLYNK_WRITE(0){
    mySwitch.send(354206,24);  //turn on switch 1B
  }
  BLYNK_WRITE(3){
    mySwitch.send(354198,24); //turn off switch 1B
  }
  BLYNK_WRITE(6){
    mySwitch.send(14331050,24); //turn on switch 3A
  }
  BLYNK_WRITE(7){
    mySwitch.send(14331042,24); //turn off switch 3A
  }
  BLYNK_WRITE(17){
    mySwitch.send(14331052,24); //turn on switch 2A
  }
  BLYNK_WRITE(18){
    mySwitch.send(14331044,24); //turn off switch 2A
  }
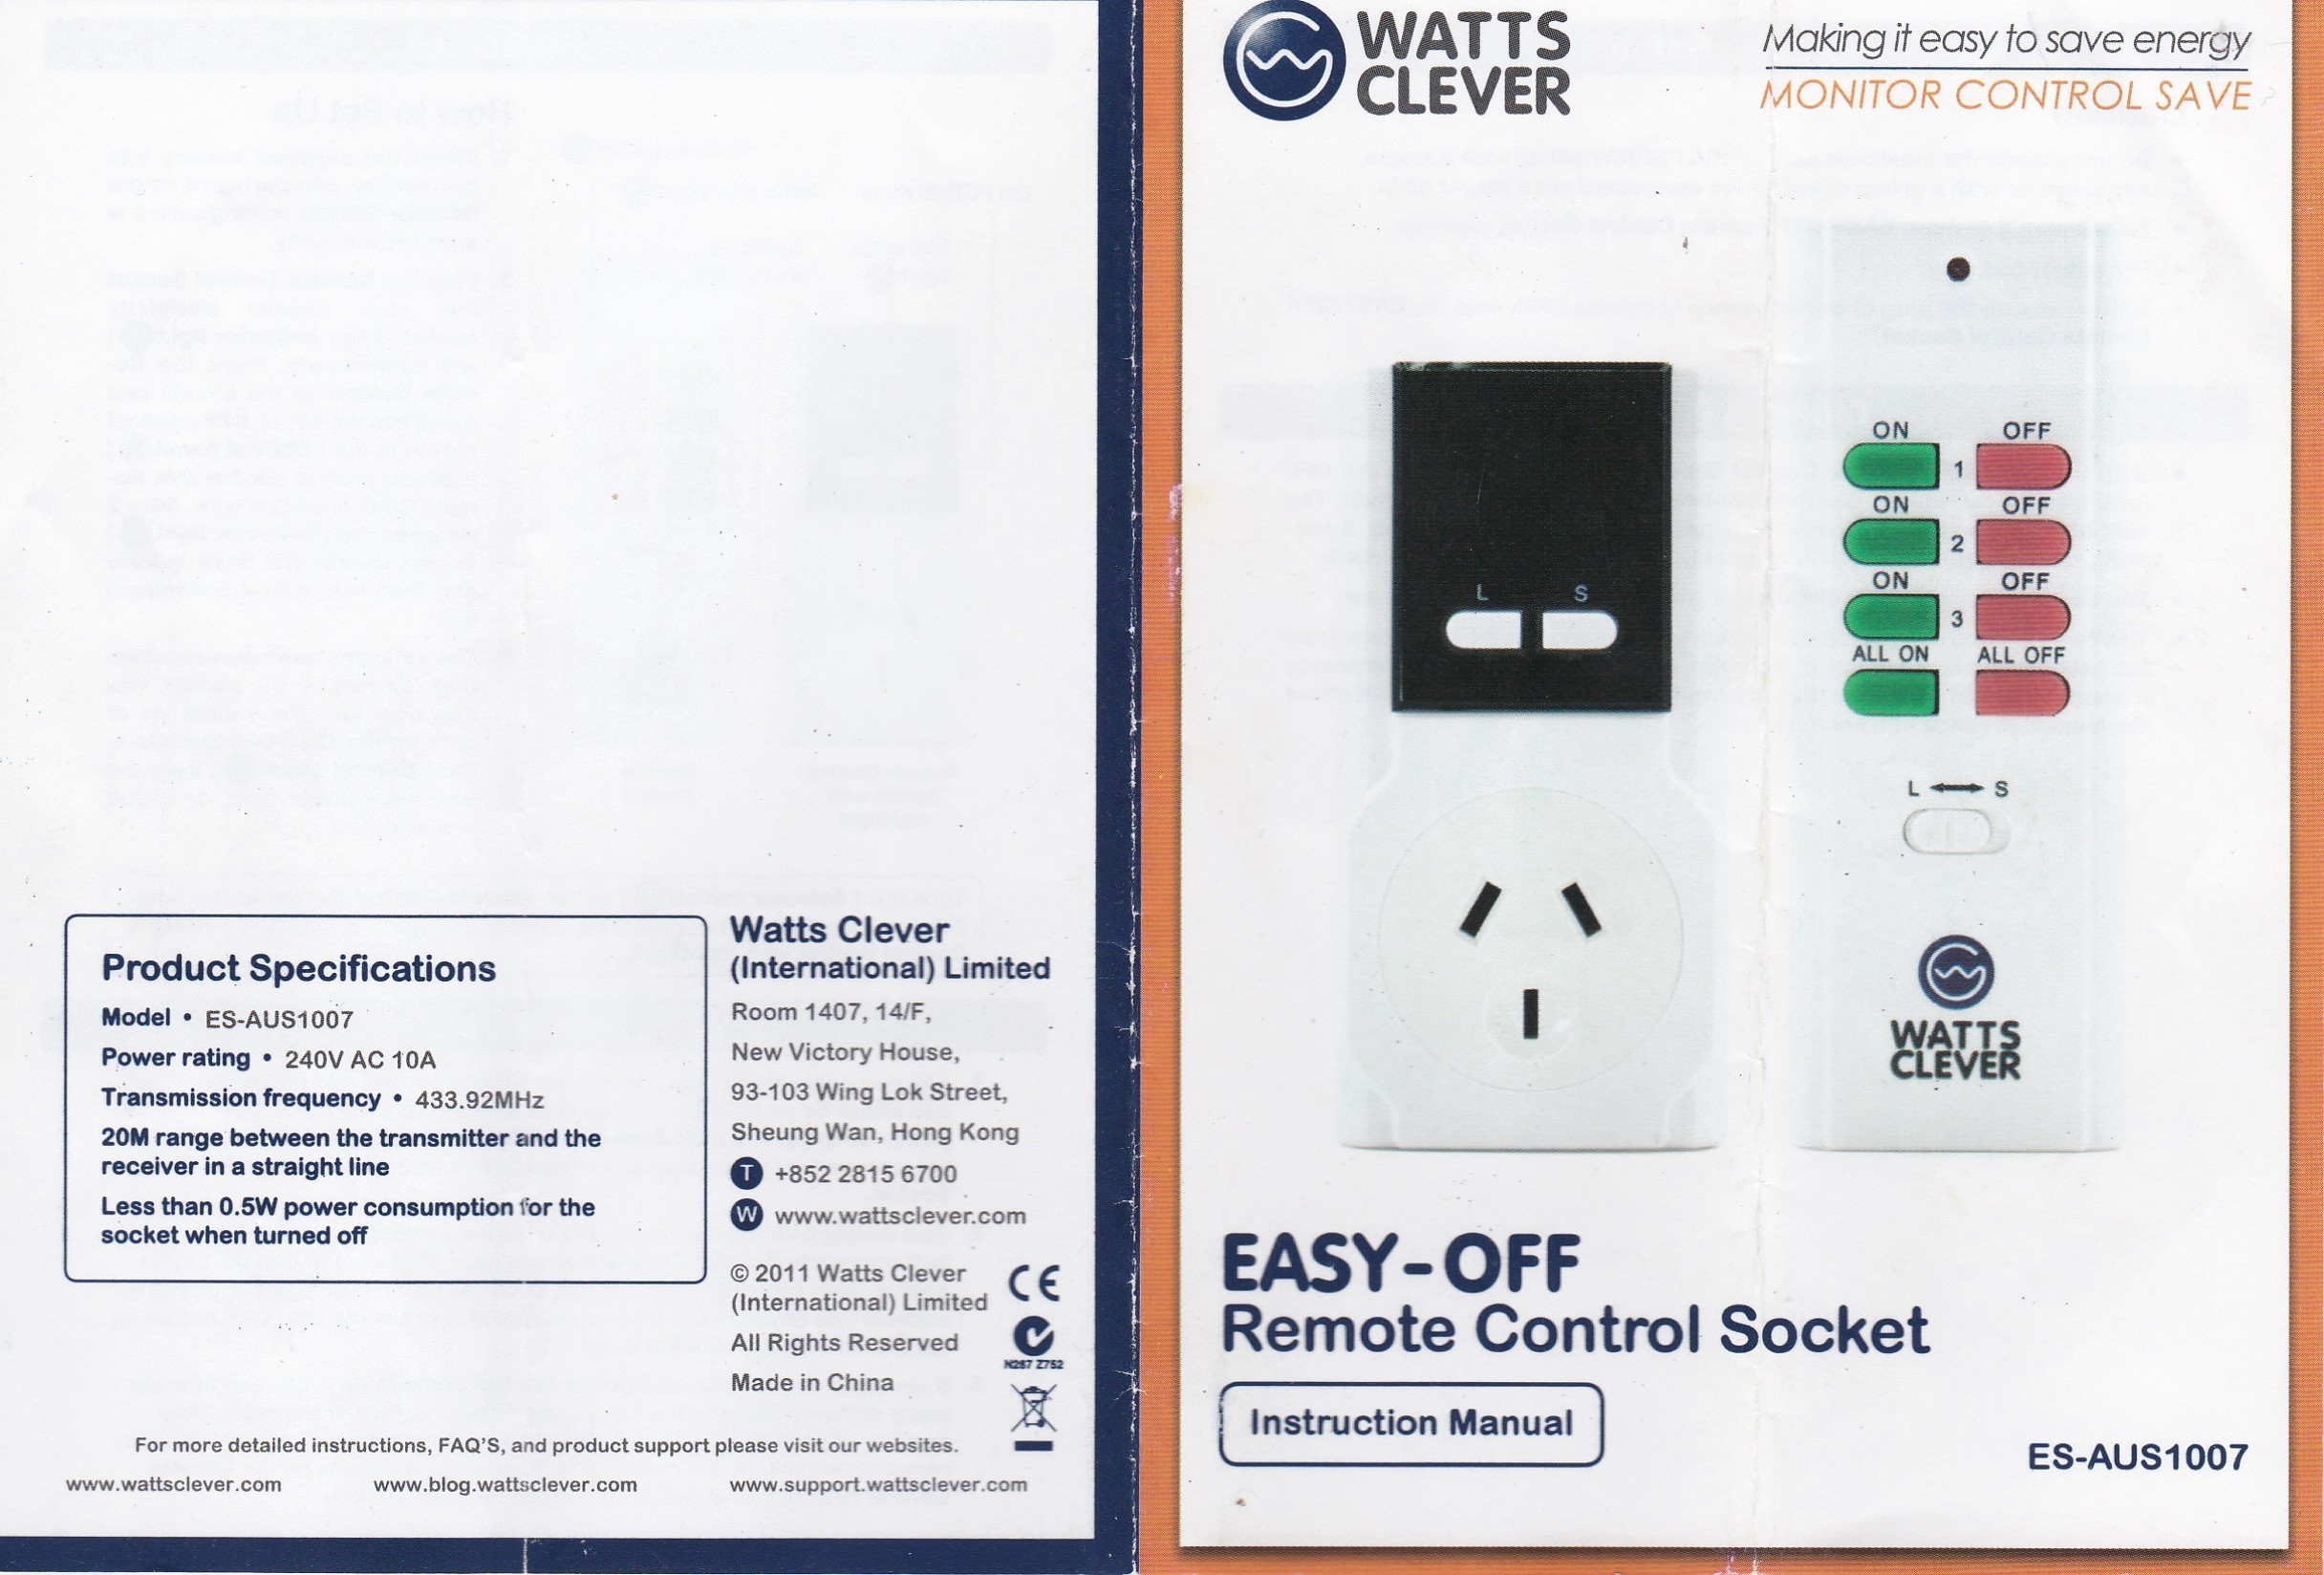
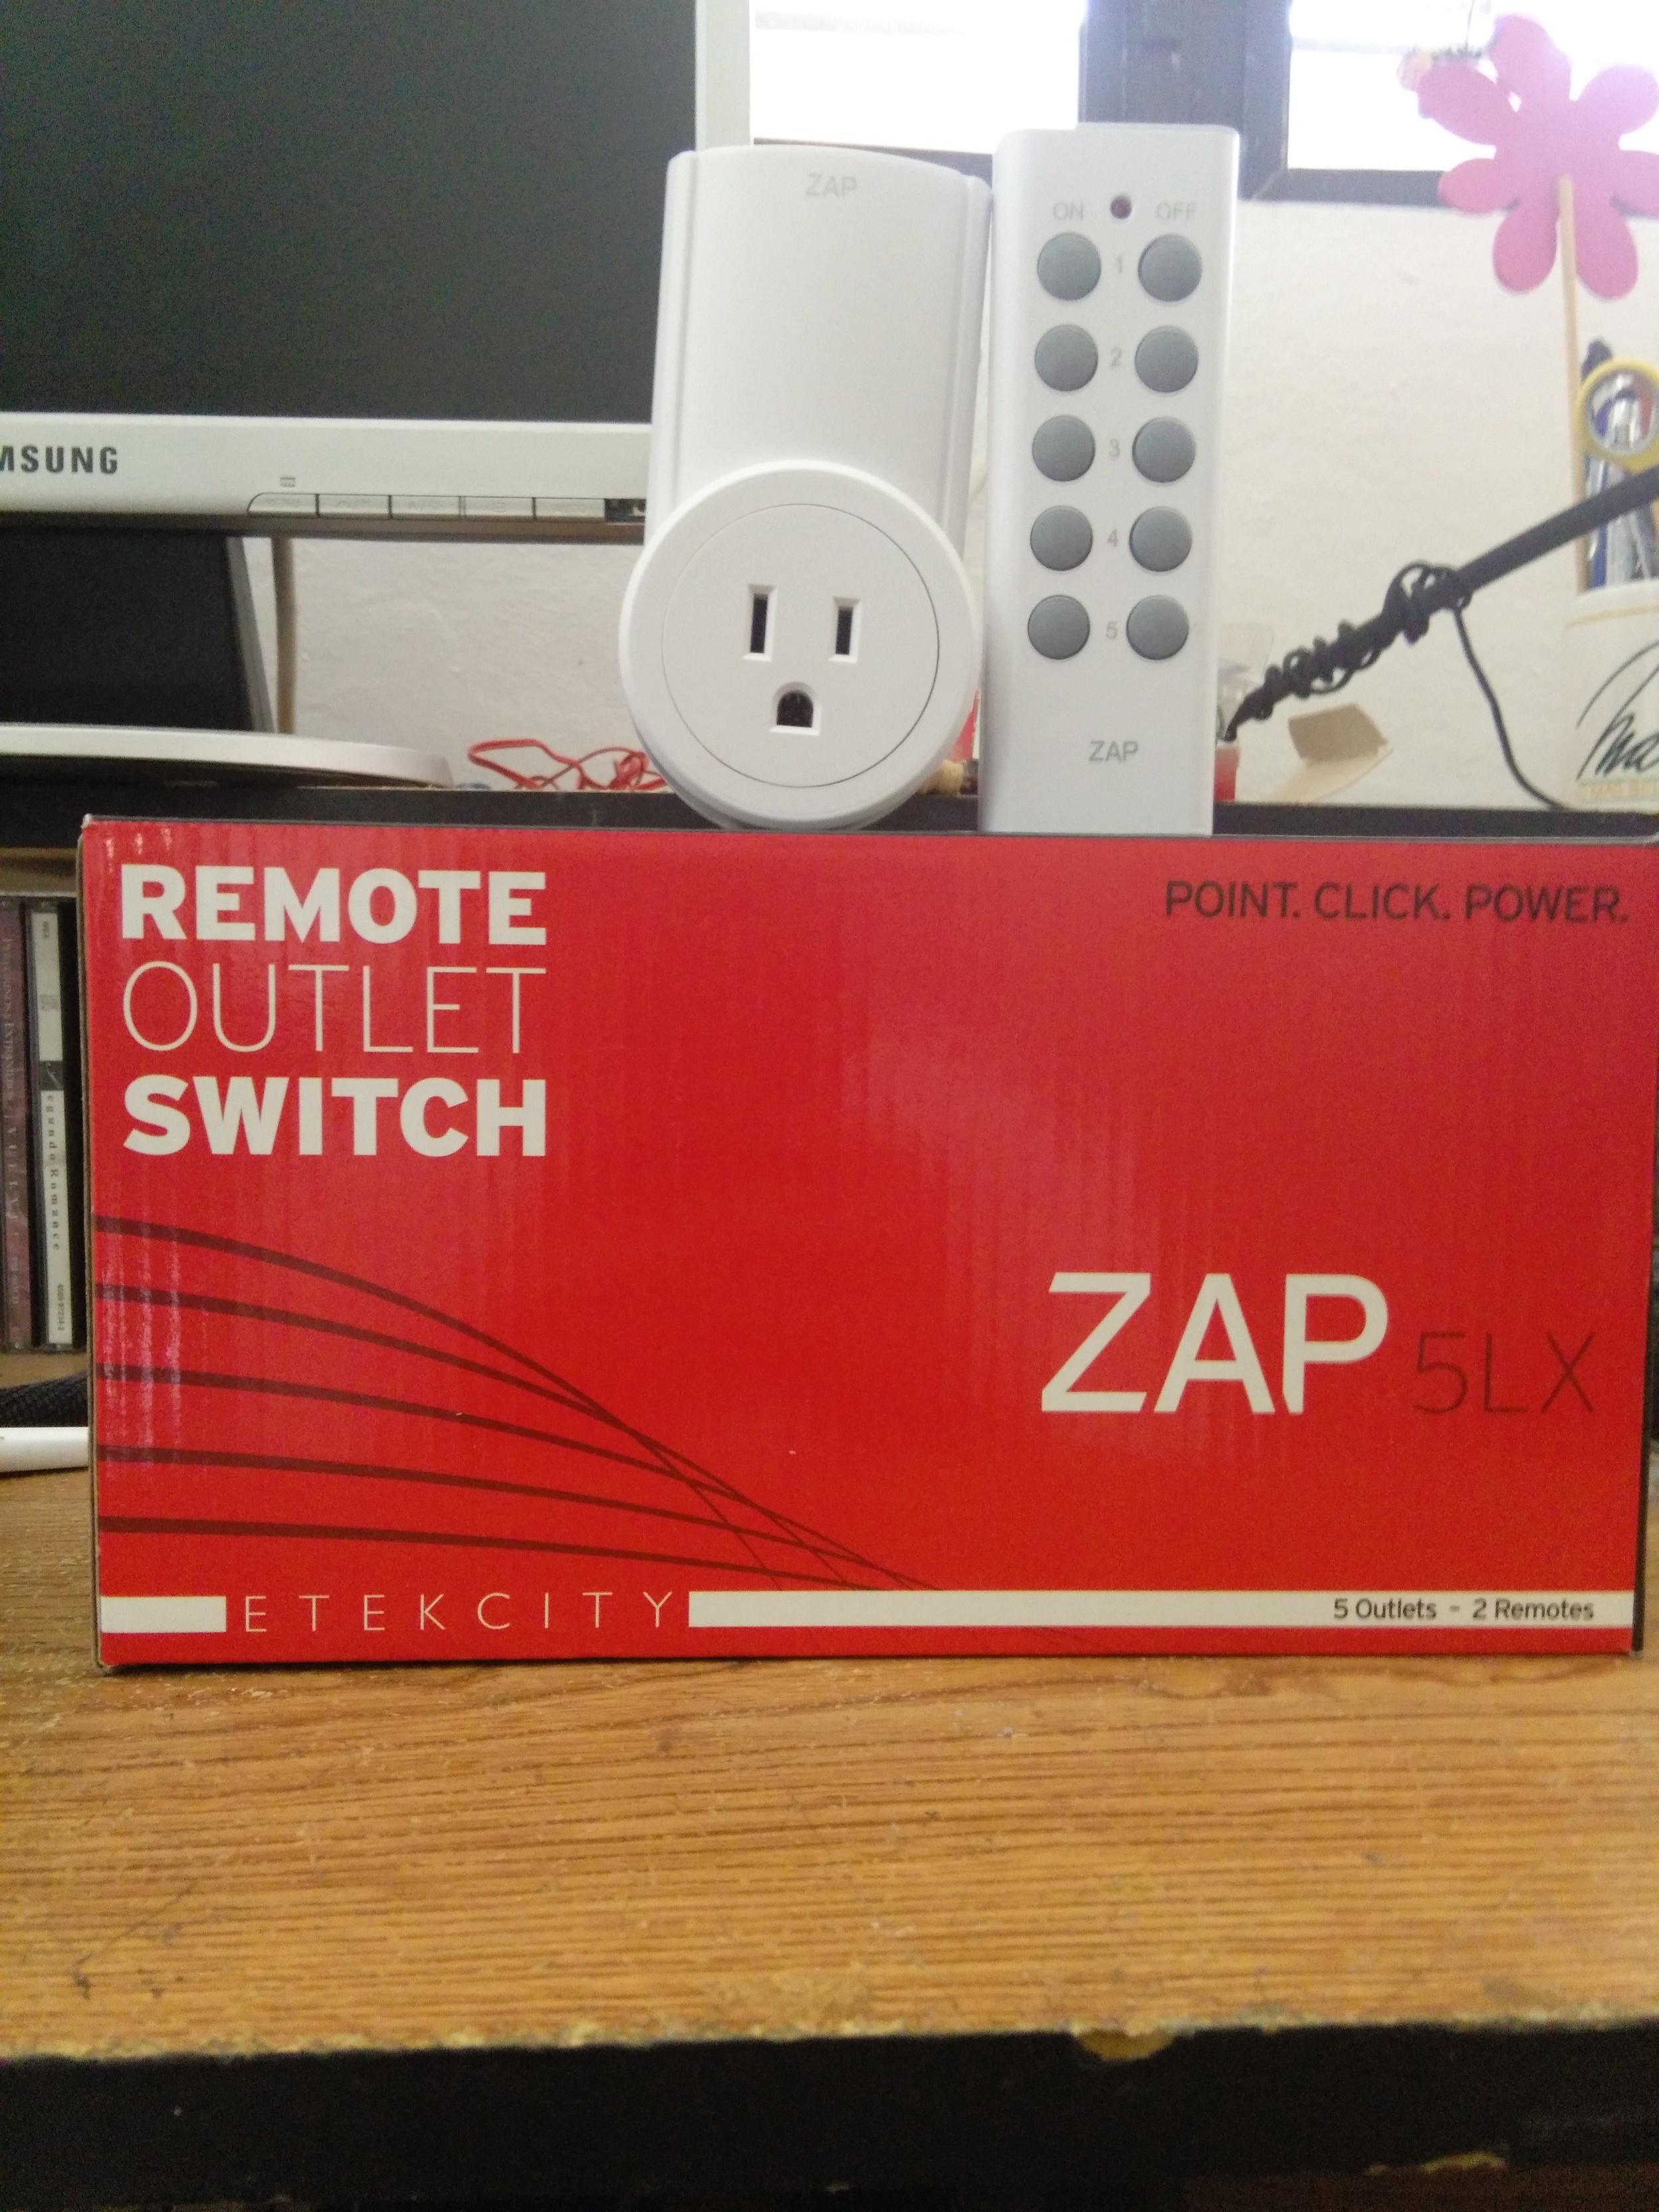
It is still a work in progress so you can ignore most of it but you should be able to see how my 433mhz sockets work with decimal code.