We’re working on a project.
Try to control the sg90 servo motor through the nodemcu.
However, there is a problem with button control.
I don’t know the on/off control code. Please help me.
BLYNK_WRITE(vPin) {  // Use Button/Switch Widget set to a corresponding vPin
  if (param.asInt() == 1) {  // If button state is 1 or HIGH
    // Run START motor code (don't block... use timed functions)
  } else {  // If button state is 0 or LOW (or actually anything else then the prior option)
    // Run STOP motor code
  }
}
Just keep asking the same question and posting random snippets of code isn’t going to get you the answers you need.
Blynk is a powerful development environment, but needs at least some understanding of the C++ coding language.
It has a few quirks, like not tolerating delays and a busy void loop, and a few functions like BLYNK_WRITE aren’t very intuitive, but you’ve been pointed at the documentation that explains all of this.
It doesn’t appear that you’ve followed those links and you’ve currently only spent 8 of reading time since joining the forum.
Learning a programming language is like learning a spoken language - it requires study, effort, experimentation and determination.
Do the research and the experimentation and come back with more appropriate questions and code examples once you’ve put some effort on.
I am going to button up wemos d1 to blynk.
But I couldn’t control the button.
How do I control buttons?
I am not sure about C language.
When you press the on button, I want to know the control code where the device turns on and the off button turns off.
Dude, starting a new topic isn’t going to get you anywhere (other than having the two topics merged by @Gunner and getting an earful in the process).
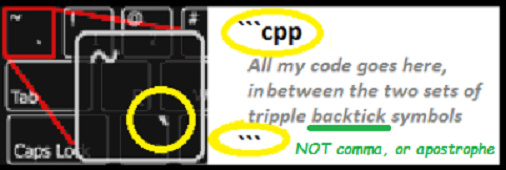
Read the documentation and links that have already been provided, and do the backticks thing when you post code.
I try to switch the servo motor on/off control using the switch button by using Wemos D1.
The servo motor is slow to turn, so I’m not sure if it’s controlled or not.
Help me please.
Don’t use delays, or other blocking code (like for() loops)… especially in the void loop() or even in sub-functions directly called from the void loop().
#include <Servo.h>

Servo servo;      // 서보모터 객체 생성

int motor = 2;    //서보모터 핀번호

int relay_blue = 12;  // 노란색 LED
int relay_red = 13;    // 파란색 LED

void setup()
{
  servo.attach(motor);    //모터 시작
  pinMode(motor,OUTPUT);  //모터 출력

  pinMode(relay_blue, OUTPUT);      // 릴레이를 출력으로 설정
  pinMode(relay_red, OUTPUT);        // 릴레이를 출력으로 설정
}

int state = LOW;    // 현재 노란색 LED가 켜졌는지, 파란색 LED가 켜졌는지 결정해 주는 변수

void loop()
{
  if(state == HIGH){  // state가 HIGH일 때,
    digitalWrite(relay_blue, state);   // 노란색 LED ON
    digitalWrite(relay_red, !state);    // 파란색 LED OFF
    for(int angle = 0; angle < 180; angle++){  // 0도에서 180도로 움직임. 노란색 LED 쪽으로 움직임
      servo.write(angle);                 // 서보모터 동작
      delay(5);                           // 서보모터의 급격한 이동을 막아줌
    }
  }
  else {              // state가 LOW일 때,
    digitalWrite(relay_blue, state);  // 노란색 LED OFF
    digitalWrite(relay_red, !state);   // 파란색 LED ON
    for(int angle = 180; angle >= 0; angle--){  // 180도에서 0도로 움직임. 파란색 LED쪽으로 움직임
      servo.write(angle);               // 서보모터 동작
      delay(5);                         // 서보모터의 급격한 이동을 막아줌
    }
  }
  state = !state;       // 상태 반전

  delay(100);           // 딜레이 500
}
I want to control servo motor and LED through switch button through relay. Please help me. I don’t know how to turn on the red light if the servo motor is turned on and the blue LED turns off.
Hello… I merged all your topics about this servo issue into one…
No need for repeatedly creating new topics if you don’t understand or listen to the previous answers.
I have already provided links to show how you can easily control a servo through Blynk… I suggest you start reading and examining them instead of creating more topics asking for the same help