Ok costas i will see it!
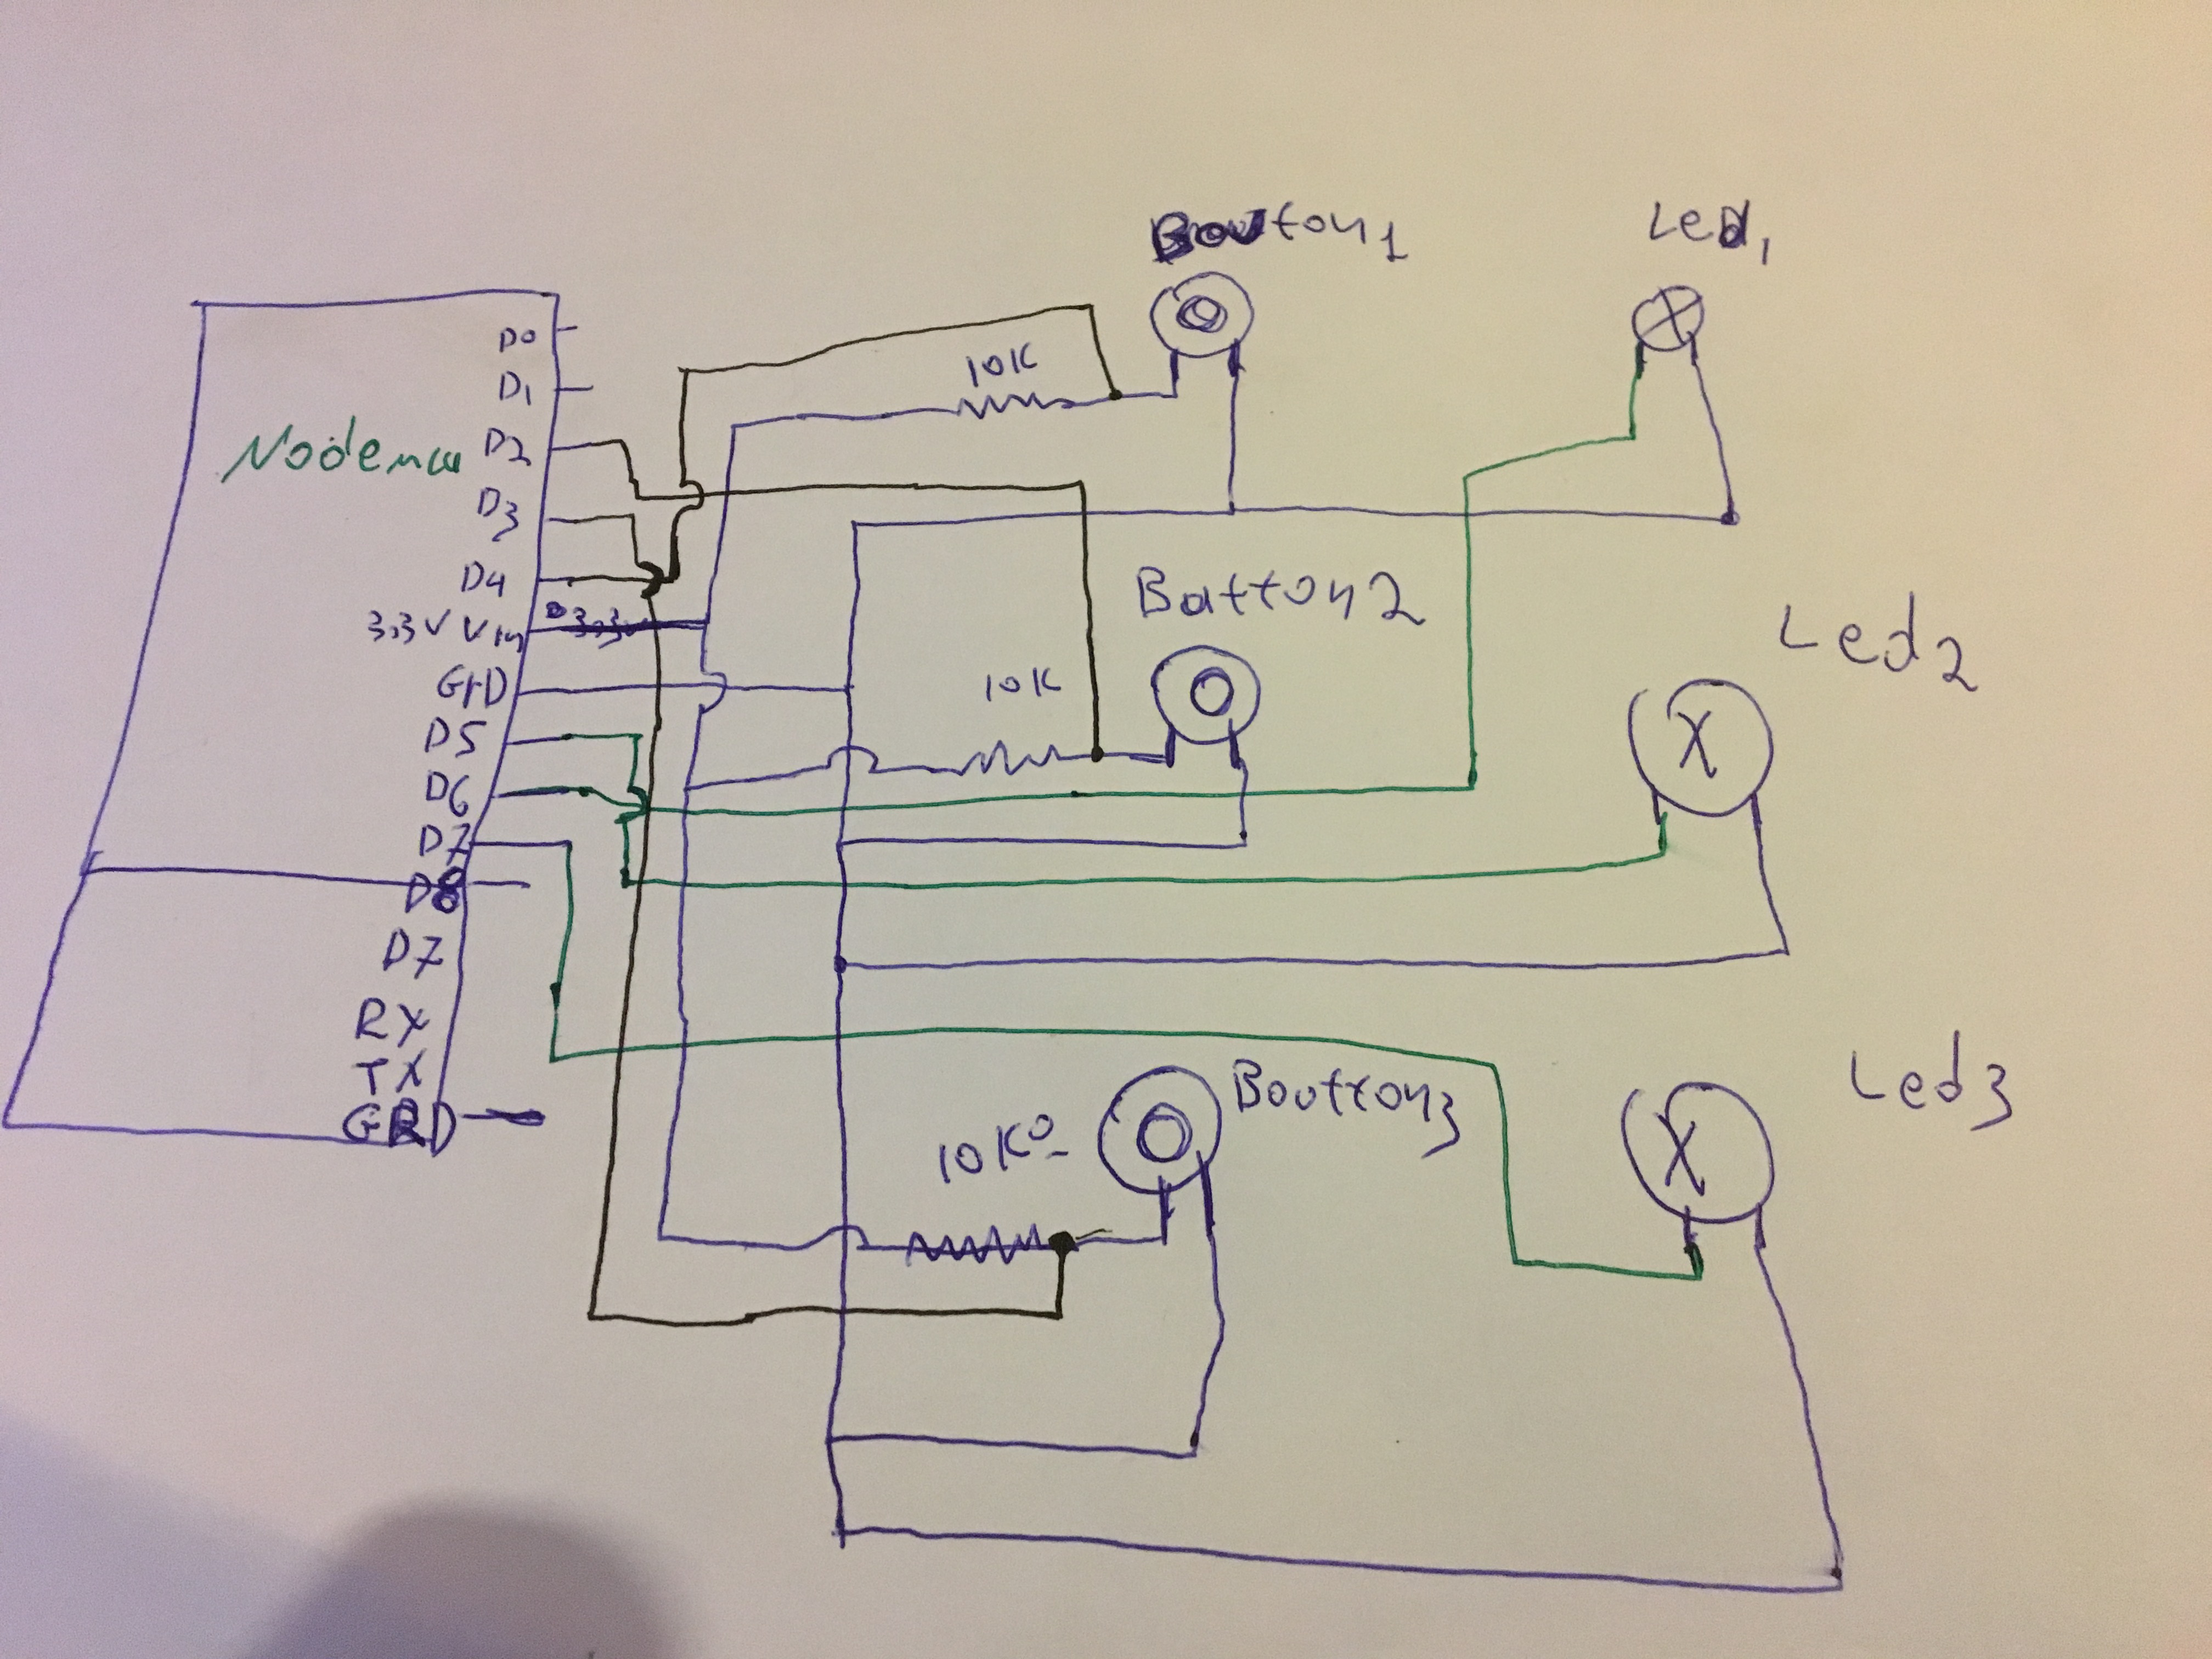
wanek.What about this connection?Is necessary to put pull up resistors like in arduino?
1 Like
the version of blynk is 0.4.10
yeah, it is clear now, you are correct of course with the pullups! i interpreted incorrectly the first drawing, my bad!
just make sure the leds do not draw too much current from the digital pins. it is good practice to put a current limit resistor in serial with the leds. if i remember correctly, max 12mA / digital pin is allowed on esp82.
Hello guys.Finally i didn’t complete the project with the nonemcu.I spent so many hours and i didn’t find the solution(for not working) because after of many many efforts i broke it because of my nerves(in the end i regret but too late.)So decided to use an ethernet shield that i had with arduino uno.I took this project https://examples.blynk.cc/?board=ESP8266&shield=ESP8266%20WiFi&example=More%2FSync%2FSyncPhysicalButton
and here i added 2 extra buttons+led.
The only problem that i notice is that when there is not ethernet,the natural buttons does not react completely wright.
/*************************************************************
  Download latest Blynk library here:
    https://github.com/blynkkk/blynk-library/releases/latest

  Blynk is a platform with iOS and Android apps to control
  Arduino, Raspberry Pi and the likes over the Internet.
  You can easily build graphic interfaces for all your
  projects by simply dragging and dropping widgets.

    Downloads, docs, tutorials: http://www.blynk.cc
    Sketch generator:           http://examples.blynk.cc
    Blynk community:            http://community.blynk.cc
    Follow us:                  http://www.fb.com/blynkapp
                                http://twitter.com/blynk_app

  Blynk library is licensed under MIT license
  This example code is in public domain.

 *************************************************************

  This example shows how to synchronize Button widget
  and physical button state.

  App project setup:
    Button widget attached to V2 (Switch mode)
 *************************************************************/

/* Comment this out to disable prints and save space */
#define BLYNK_PRINT Serial
#include <SPI.h>
#include <Ethernet.h>
#include <BlynkSimpleEthernet.h>

// You should get Auth Token in the Blynk App.
// Go to the Project Settings (nut icon).
char auth[] = "9e03981a27ad4f4ea28389ca95f58028";
#define W5100_CS  10
#define SDCARD_CS 4

// Set your LED and physical button pins here
const int ledPin1 = 6;
const int btnPin1 = 2;

const int ledPin2 = 8;
const int btnPin2 = 3;

const int ledPin3 = 9;
const int btnPin3 = 5;

BlynkTimer timer;
void checkPhysicalButton();

int ledState1 = LOW;
int btnState1 = HIGH;

int ledState2 = LOW;
int btnState2 = HIGH;

int ledState3 = LOW;
int btnState3 = HIGH;

// Every time we connect to the cloud...
BLYNK_CONNECTED() {
  // Request the latest state from the server
  Blynk.syncVirtual(V2);
  Blynk.syncVirtual(V3);
  Blynk.syncVirtual(V4);
  // Alternatively, you could override server state using:
  //Blynk.virtualWrite(V2, ledState);
}

// When App button is pushed - switch the state
BLYNK_WRITE(V2) {
  ledState1 = param.asInt();
  digitalWrite(ledPin1, ledState1);
}

BLYNK_WRITE(V3) {
  ledState2 = param.asInt();
  digitalWrite(ledPin2, ledState2);
}

BLYNK_WRITE(V4) {
  ledState3 = param.asInt();
  digitalWrite(ledPin3, ledState3);
}

void checkPhysicalButton()
{    //FOR BUTTON1
  if (digitalRead(btnPin1) == LOW) {
    // btnState is used to avoid sequential toggles
    if (btnState1 != LOW) {

      // Toggle LED state
      ledState1 = !ledState1;
      digitalWrite(ledPin1, ledState1);

      // Update Button Widget
      Blynk.virtualWrite(V2, ledState1);
    }
    btnState1 = LOW;
  } else {
    btnState1 = HIGH;
  }

     //FOR BUTTON2
    if (digitalRead(btnPin2) == LOW) {
    // btnState is used to avoid sequential toggles
    if (btnState2 != LOW) {

      // Toggle LED state
      ledState2 = !ledState2;
      digitalWrite(ledPin2, ledState2);

      // Update Button Widget
      Blynk.virtualWrite(V3, ledState2);
    }
    btnState2 = LOW;
  } else {
    btnState2 = HIGH;
  }

 //FOR BUTTON3
   if (digitalRead(btnPin3) == LOW) {
    // btnState is used to avoid sequential toggles
    if (btnState3 != LOW) {

      // Toggle LED state
      ledState3 = !ledState3;
      digitalWrite(ledPin3, ledState3);

      // Update Button Widget
      Blynk.virtualWrite(V4, ledState3);
    }
    btnState3 = LOW;
  } else {
    btnState3 = HIGH;
  }
}

void setup()
{
  // Debug console
  Serial.begin(9600);

  pinMode(SDCARD_CS, OUTPUT);
  digitalWrite(SDCARD_CS, HIGH); // Deselect the SD card

  Blynk.begin(auth);
  // You can also specify server:
  //Blynk.begin(auth, "blynk-cloud.com", 8442);
  //Blynk.begin(auth, IPAddress(192,168,1,100), 8442);

  pinMode(ledPin1, OUTPUT);
  pinMode(btnPin1, INPUT_PULLUP);
  digitalWrite(ledPin1, ledState1);

 pinMode(ledPin2, OUTPUT);
  pinMode(btnPin2, INPUT_PULLUP);
  digitalWrite(ledPin2, ledState2);

   pinMode(ledPin3, OUTPUT);
  pinMode(btnPin3, INPUT_PULLUP);
  digitalWrite(ledPin3, ledState3);
  // Setup a function to be called every 100 ms
  timer.setInterval(100L, checkPhysicalButton);
}

void loop()
{
  Blynk.run();
  timer.run();
}
Wanek sorry for the code.I can’t understand how realy works Preformatted text
Don’t bother with the </> method, it doesn’t always work.
Just type in three back-tick characters, the three letters cpp then paste your code and enter three more back-tick characters.
