[Solved] Wemos D1 mini + dht11 shield + example = Failed to read from DHT sensor!

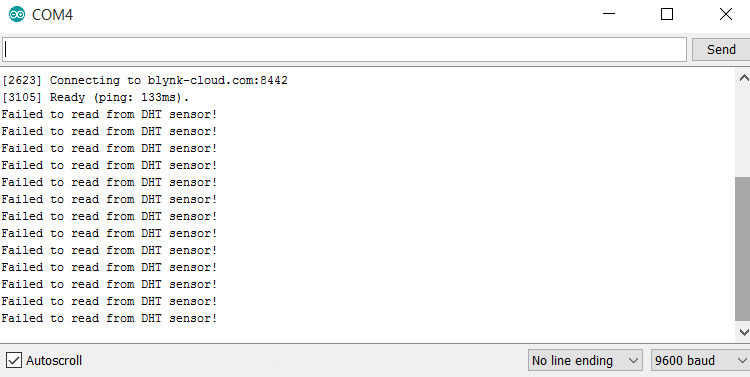
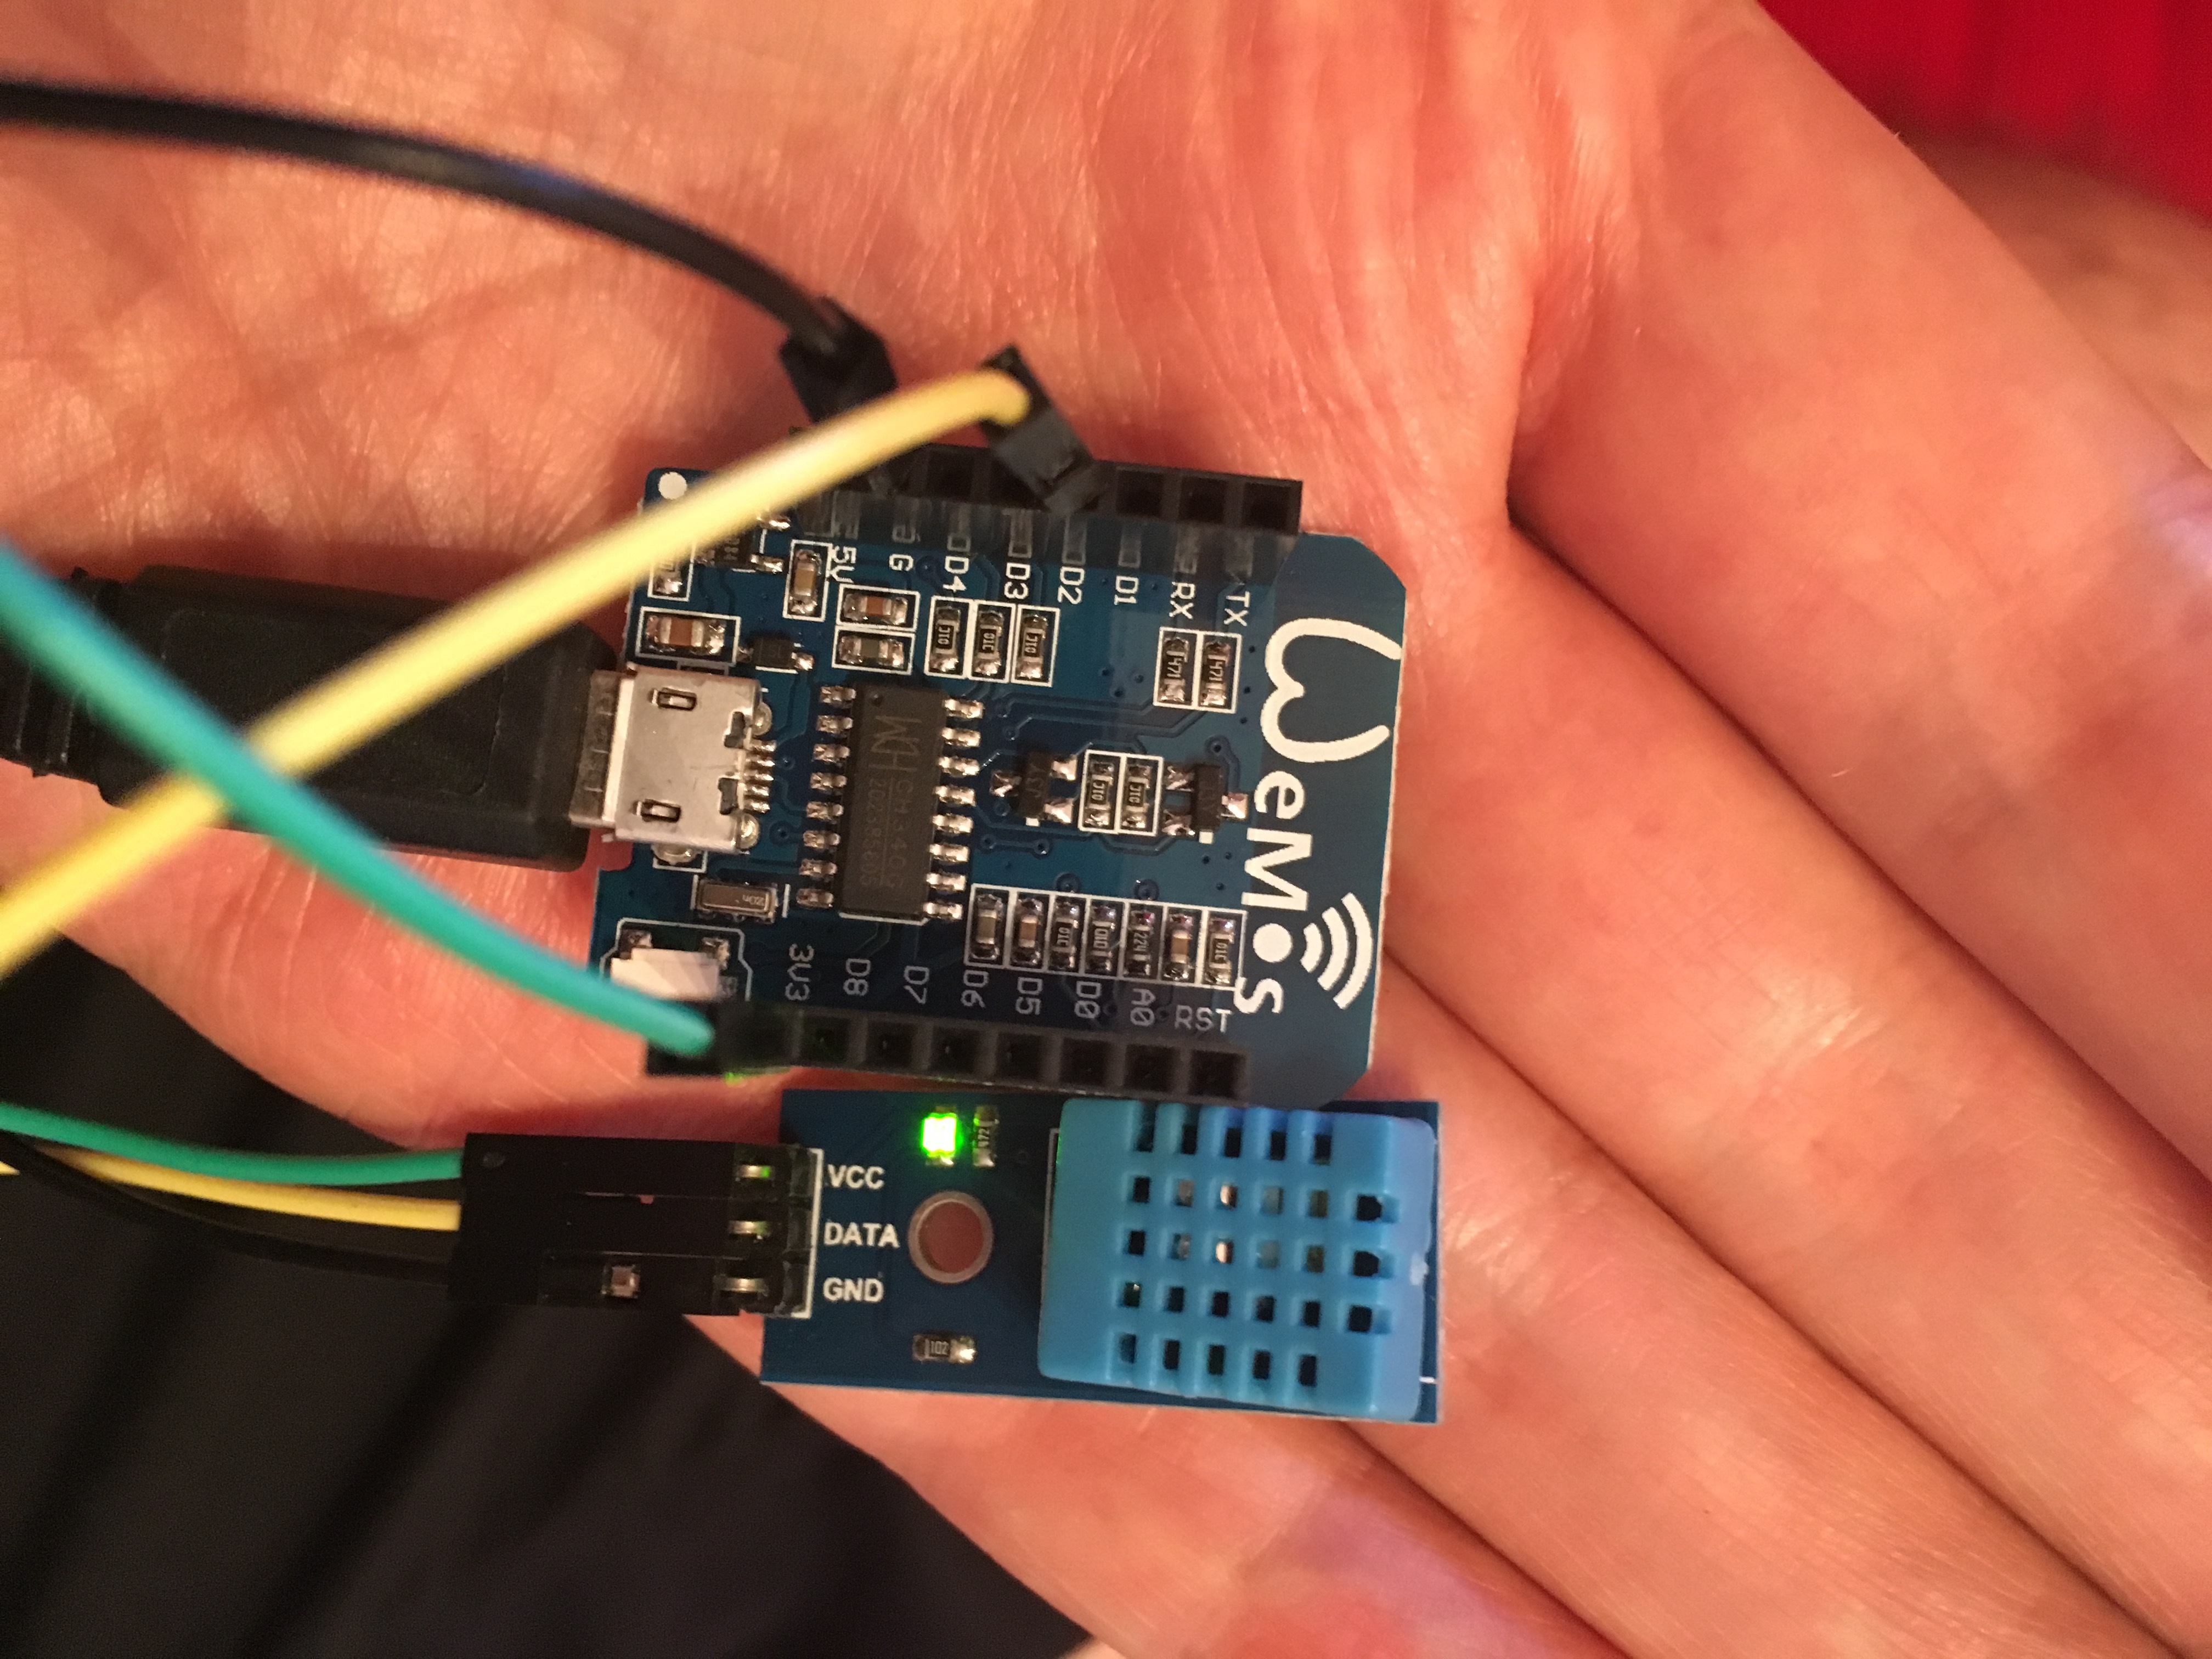
Hi everybody. I’m running the example code for Wemos and dht11 from here http://examples.blynk.cc/ with a dht11 shield like on the photo. I tried with Wemos mini and standard and same issue:

[5263] Connected to WiFi
[5263] My IP: 192.168.0.29
[5263] Connecting to cloud.blynk.cc:8442
Failed to read from DHT sensor!

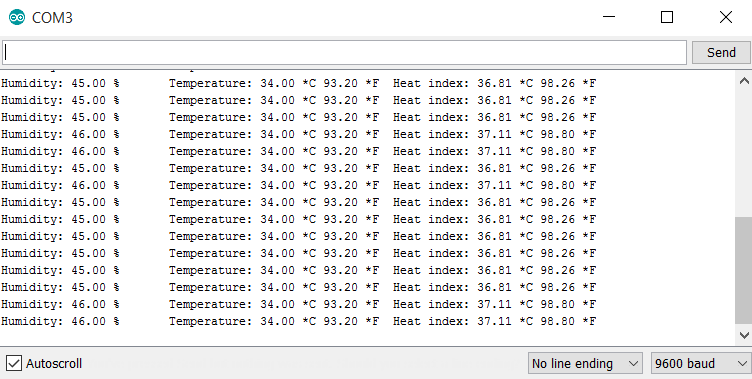
Photo of my connection:

Thank you very much

Here is the Code Extracted from page above:

#include <ESP8266WiFi.h>
#include <BlynkSimpleEsp8266.h>
#include <SimpleTimer.h>
#include <DHT.h>

// You should get Auth Token in the Blynk App.
// Go to the Project Settings (nut icon).
char auth[] = “YourAuthToken”;

// Your WiFi credentials.
// Set password to “” for open networks.
char ssid[] = “YourNetworkName”;
char pass[] = “YourPassword”;

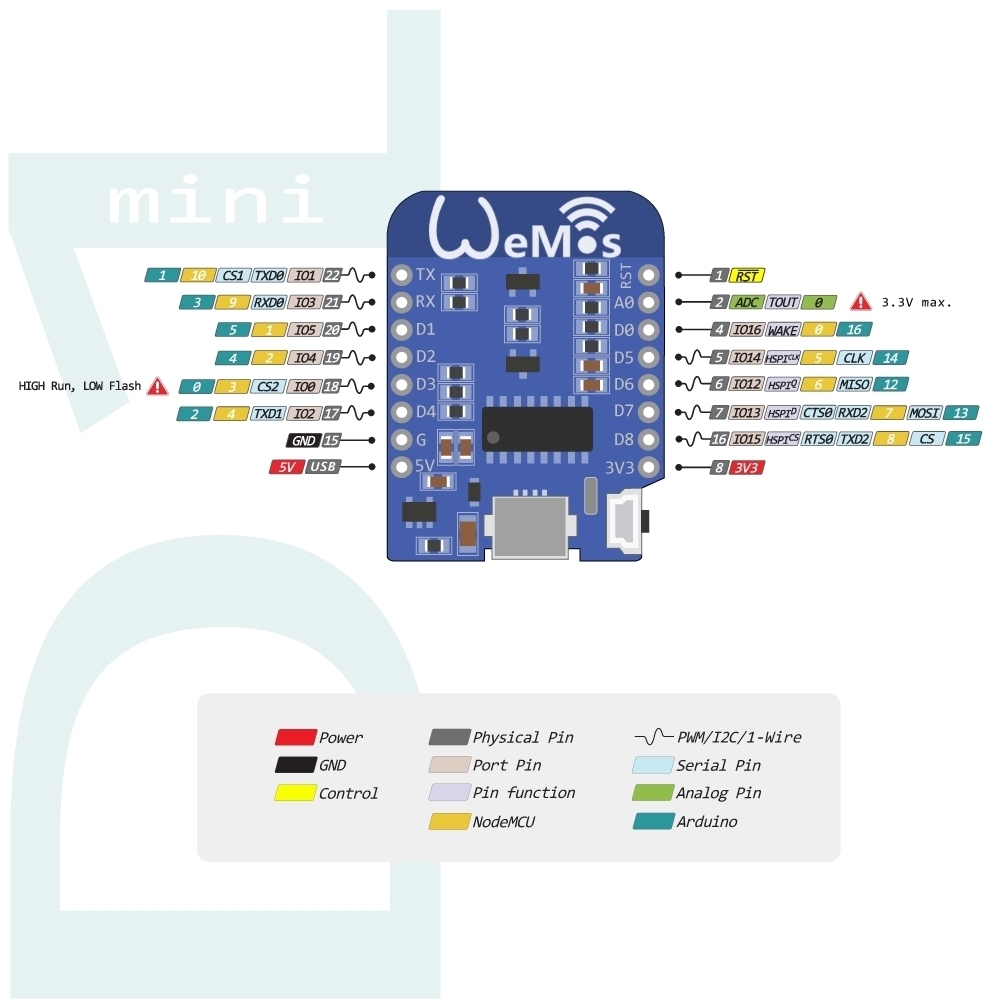
#define DHTPIN 2 // What digital pin we’re connected to

// Uncomment whatever type you’re using!
#define DHTTYPE DHT11 // DHT 11
//#define DHTTYPE DHT22 // DHT 22, AM2302, AM2321
//#define DHTTYPE DHT21 // DHT 21, AM2301

DHT dht(DHTPIN, DHTTYPE);
SimpleTimer timer;

// This function sends Arduino’s up time every second to Virtual Pin (5).
// In the app, Widget’s reading frequency should be set to PUSH. This means
// that you define how often to send data to Blynk App.
void sendSensor()
{
float h = dht.readHumidity();
float t = dht.readTemperature(); // or dht.readTemperature(true) for Fahrenheit

if (isnan(h) || isnan(t)) {
Serial.println(“Failed to read from DHT sensor!”);
return;
}
// You can send any value at any time.
// Please don’t send more that 10 values per second.
Blynk.virtualWrite(V5, h);
Blynk.virtualWrite(V6, t);
}

void setup()
{
// Debug console
Serial.begin(9600);

Blynk.begin(auth, ssid, pass);
// You can also specify server:
//Blynk.begin(auth, ssid, pass, “blynk-cloud.com”, 8442);
//Blynk.begin(auth, ssid, pass, IPAddress(192,168,1,100), 8442);

dht.begin();

// Setup a function to be called every second
timer.setInterval(1000L, sendSensor);
}

void loop()
{
Blynk.run();
timer.run(); // Initiates SimpleTimer
}

This is your bug. Pin 2 is NOT D2.
Look up the pinout on the WeMos site.

That’s right !!!. Thanks you very much !!!

similar problem is existing in node mcu.what may be the problem?

@Raju_Kumar are you confused over the ESP pinout like the OP?

I am also facing the same issue.
which pin numbering should i use ?
I want to connect it to D3

D3 is GPIO 0, you do not want to use that pin. it is a “special” pin that needs to be in a certain state at boot. ESP8266 Special Pins

I’d use D5 (gpio 4), D6 (gpio12) or D7 (gpio13)

same problem

#define BLYNK_PRINT Serial


#include <ESP8266WiFi.h>
#include <BlynkSimpleEsp8266.h>
#include <DHT.h>

// You should get Auth Token in the Blynk App.
// Go to the Project Settings (nut icon).
char auth[] = "token";

// Your WiFi credentials.
// Set password to "" for open networks.
char ssid[] = "ssid";
char pass[] = "pass";

#define DHTPIN 12          // What digital pin we're connected to

// Uncomment whatever type you're using!
#define DHTTYPE DHT11     // DHT 11
//#define DHTTYPE DHT22   // DHT 22, AM2302, AM2321
//#define DHTTYPE DHT21   // DHT 21, AM2301

DHT dht(DHTPIN, DHTTYPE);
BlynkTimer timer;

// This function sends Arduino's up time every second to Virtual Pin (5).
// In the app, Widget's reading frequency should be set to PUSH. This means
// that you define how often to send data to Blynk App.
void sendSensor()
{
  float h = dht.readHumidity();
  float t = dht.readTemperature(); // or dht.readTemperature(true) for Fahrenheit

  if (isnan(h) || isnan(t)) {
    Serial.println("Failed to read from DHT sensor!");
    return;
  }
  // You can send any value at any time.
  // Please don't send more that 10 values per second.
  Blynk.virtualWrite(V5, h);
  Blynk.virtualWrite(V6, t);
}

void setup()
{
  // Debug console
  Serial.begin(9600);

  Blynk.begin(auth, ssid, pass);
  // You can also specify server:
  //Blynk.begin(auth, ssid, pass, "blynk-cloud.com", 8442);
  //Blynk.begin(auth, ssid, pass, IPAddress(192,168,1,100), 8442);

  dht.begin();

  // Setup a function to be called every second
  timer.setInterval(5000L, sendSensor);
}

void loop()
{
  Blynk.run();
  timer.run();
}

This DHT tester code working perfectly.
can anyone explain why DHT sketch for Blynk is not working??

// Example testing sketch for various DHT humidity/temperature sensors
// Written by ladyada, public domain

#include "DHT.h"

#define DHTPIN 0     // what digital pin we're connected to

// Uncomment whatever type you're using!
#define DHTTYPE DHT11   // DHT 11
//#define DHTTYPE DHT22   // DHT 22  (AM2302), AM2321
//#define DHTTYPE DHT21   // DHT 21 (AM2301)

// Connect pin 1 (on the left) of the sensor to +5V
// NOTE: If using a board with 3.3V logic like an Arduino Due connect pin 1
// to 3.3V instead of 5V!
// Connect pin 2 of the sensor to whatever your DHTPIN is
// Connect pin 4 (on the right) of the sensor to GROUND
// Connect a 10K resistor from pin 2 (data) to pin 1 (power) of the sensor

// Initialize DHT sensor.
// Note that older versions of this library took an optional third parameter to
// tweak the timings for faster processors.  This parameter is no longer needed
// as the current DHT reading algorithm adjusts itself to work on faster procs.
DHT dht(DHTPIN, DHTTYPE);

void setup() {
  Serial.begin(9600);
  Serial.println("DHTxx test!");

  dht.begin();
}

void loop() {
  // Wait a few seconds between measurements.
  delay(2000);

  // Reading temperature or humidity takes about 250 milliseconds!
  // Sensor readings may also be up to 2 seconds 'old' (its a very slow sensor)
  float h = dht.readHumidity();
  // Read temperature as Celsius (the default)
  float t = dht.readTemperature();
  // Read temperature as Fahrenheit (isFahrenheit = true)
  float f = dht.readTemperature(true);

  // Check if any reads failed and exit early (to try again).
  if (isnan(h) || isnan(t) || isnan(f)) {
    Serial.println("Failed to read from DHT sensor!");
    return;
  }

  // Compute heat index in Fahrenheit (the default)
  float hif = dht.computeHeatIndex(f, h);
  // Compute heat index in Celsius (isFahreheit = false)
  float hic = dht.computeHeatIndex(t, h, false);

  Serial.print("Humidity: ");
  Serial.print(h);
  Serial.print(" %\t");
  Serial.print("Temperature: ");
  Serial.print(t);
  Serial.print(" *C ");
  Serial.print(f);
  Serial.print(" *F\t");
  Serial.print("Heat index: ");
  Serial.print(hic);
  Serial.print(" *C ");
  Serial.print(hif);
  Serial.println(" *F");
}

sorry, guys
it’s working perfectly.

void sendSensor()
{
  float h = dht.readHumidity();
  float t = dht.readTemperature(); // or dht.readTemperature(true) for Fahrenheit

  if (isnan(h) || isnan(t)) {
    Serial.println("Failed to read from DHT sensor!");
    return;
  }
  // You can send any value at any time.
  // Please don't send more that 10 values per second.
   //Serial.println("Humidity: ");
  //Serial.println(h);
  //Serial.println(" %\t");
  //Serial.println("Temperature: ");
  //Serial.println(t);
  Blynk.virtualWrite(V5, h);
  Blynk.virtualWrite(V6, t);
}

there were no serial print statement for the temperature & humidity.
it print statments when error occurs.&often logs error statements.or problem may be due to lose contacts in wires.

Why? Especially on “poor little” ESP-01 there isn’t much to choose from. I’m using it as an output, and never had any issue. I think that as an INPUT, where it is pulled up by default (as it is the case with DHT’s) it will work just fine too.
I know what is the role of GPIO0 on ESP, but i don’t care about it during boot/flash stage. It never goes low on it’s own while booted (intentionally or not).

According to the chart in this post:

It oscillates then stabilises stabilises HIGH after around 100ms when the ESP is booted. So it could be LOW briefly during this time, but that won’t be an issue in most cases.
For someone who’s just wanting to connect a DHT11 and a couple of switches, and is a newcomer to working with ESPs, there’s are better pins to choose.

More advanced users can safely use almost all of the pins on an ESP, as we know what to look out for and how to choose appropriate pins for specific uses. But as a rule of thumb for newcomers it’s better to steer them away from the pins that may bite them in future.

Pete.

3 Likes

Thanks @PeteKnight for digging it out. Nice work done by @wanek :slight_smile:

1 Like