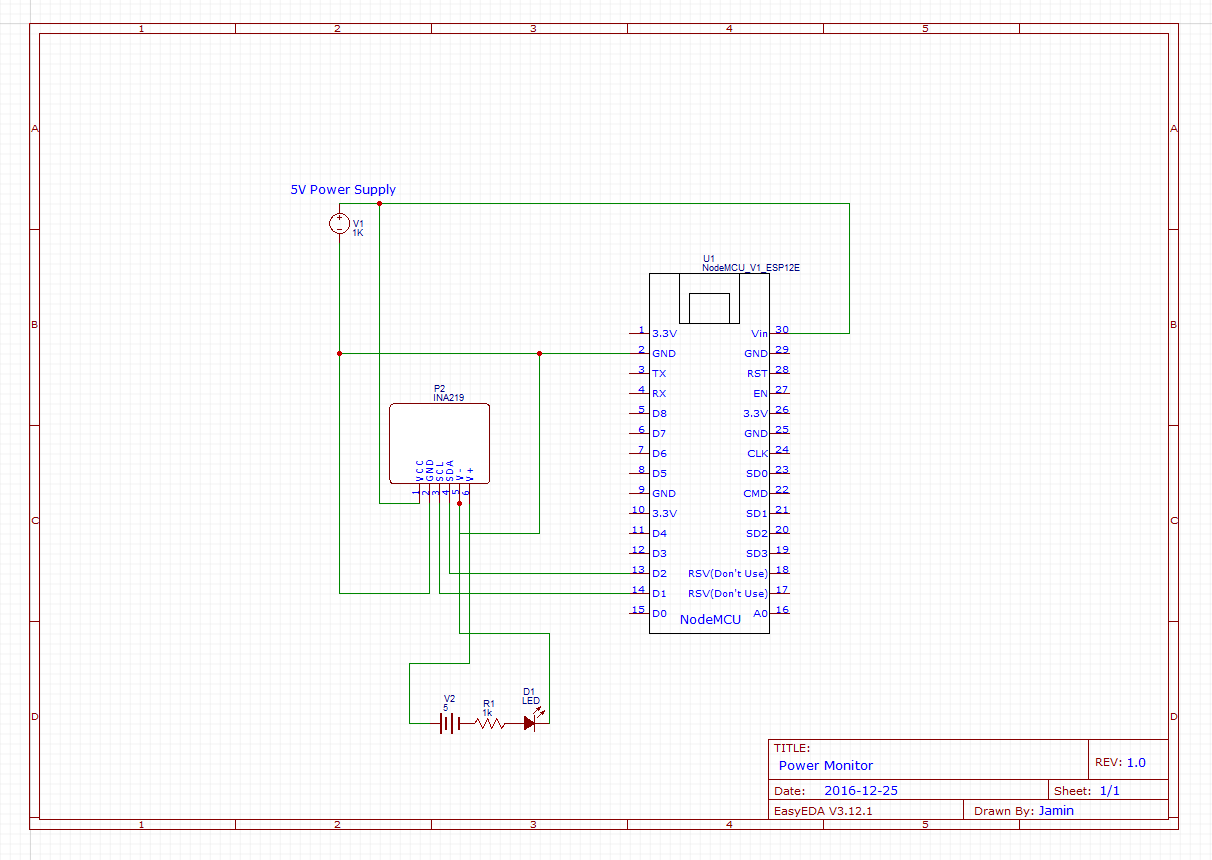
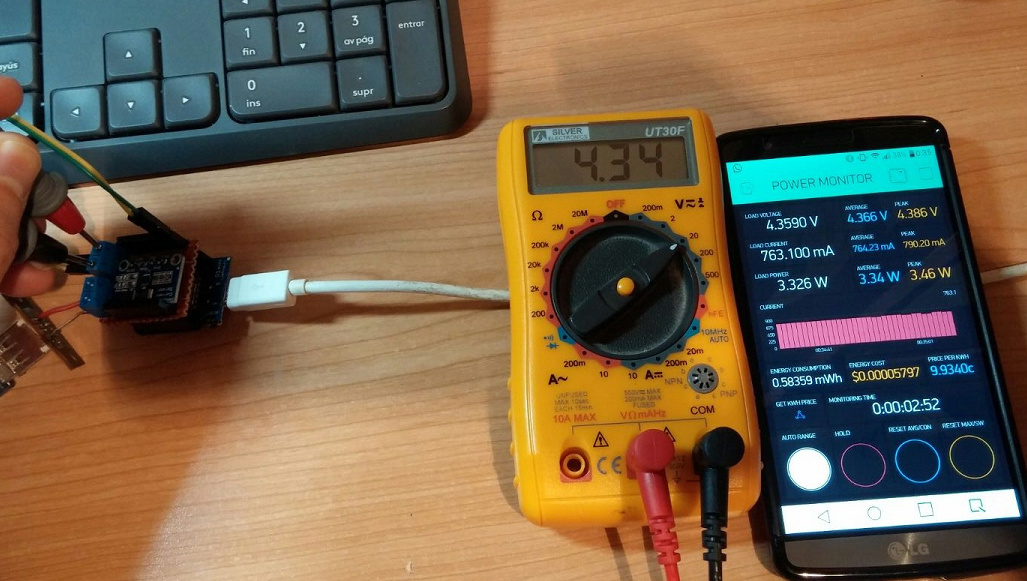
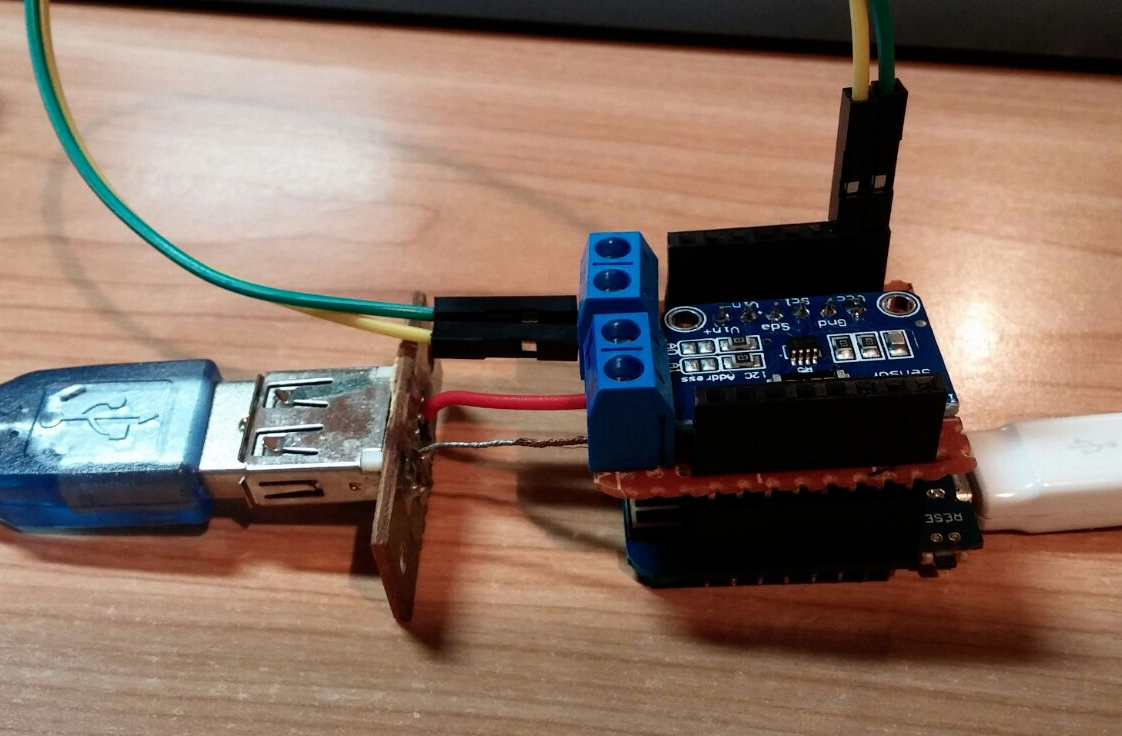
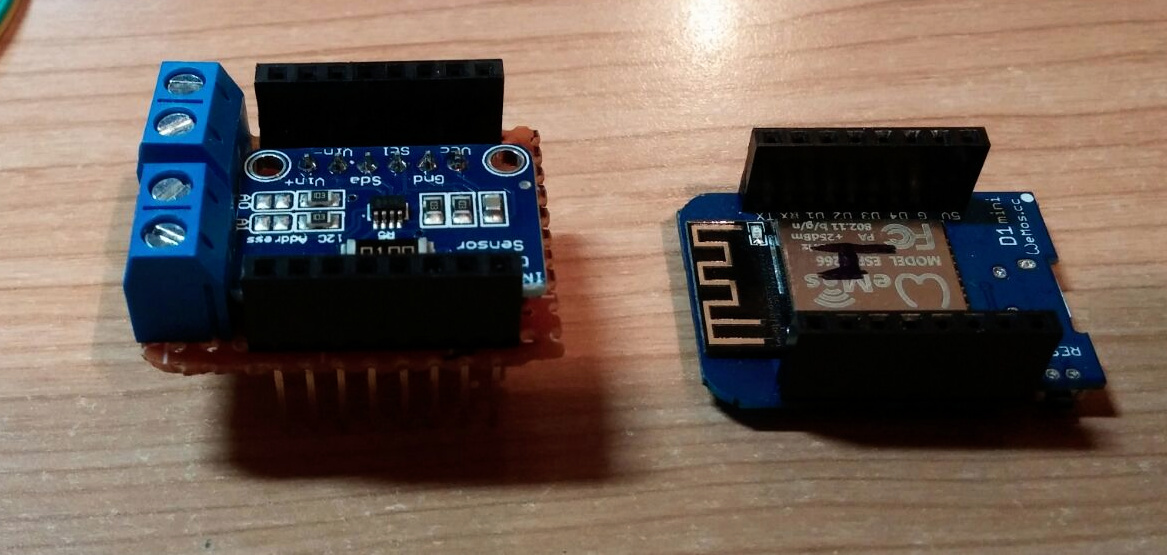
I built a simple Power Meter you can use to measure 0-26V and up to 3.2A. Which makes a great addition to your workshop by allowing you to monitor voltage, current, power and energy used over time on almost any DC device.
Right now it just polls at 1second… I tried to set up a slider for the interval but ran in to problems so will sleep on it. I did however just set up a HOLD button so you can pause the polling.
There are many more features I would love to add. But currently this is working perfectly. So it would be a geat place for people to start with a working example for Blynk. So I would love to see what other ideas people can come up with. Please leave comments below.
Yeah it can be anything… im just used to using 1023/1024 for so many things.
Its bascially in auto-resolution mode. It wouldn’t be hard to add a button widget which turns off that mode.
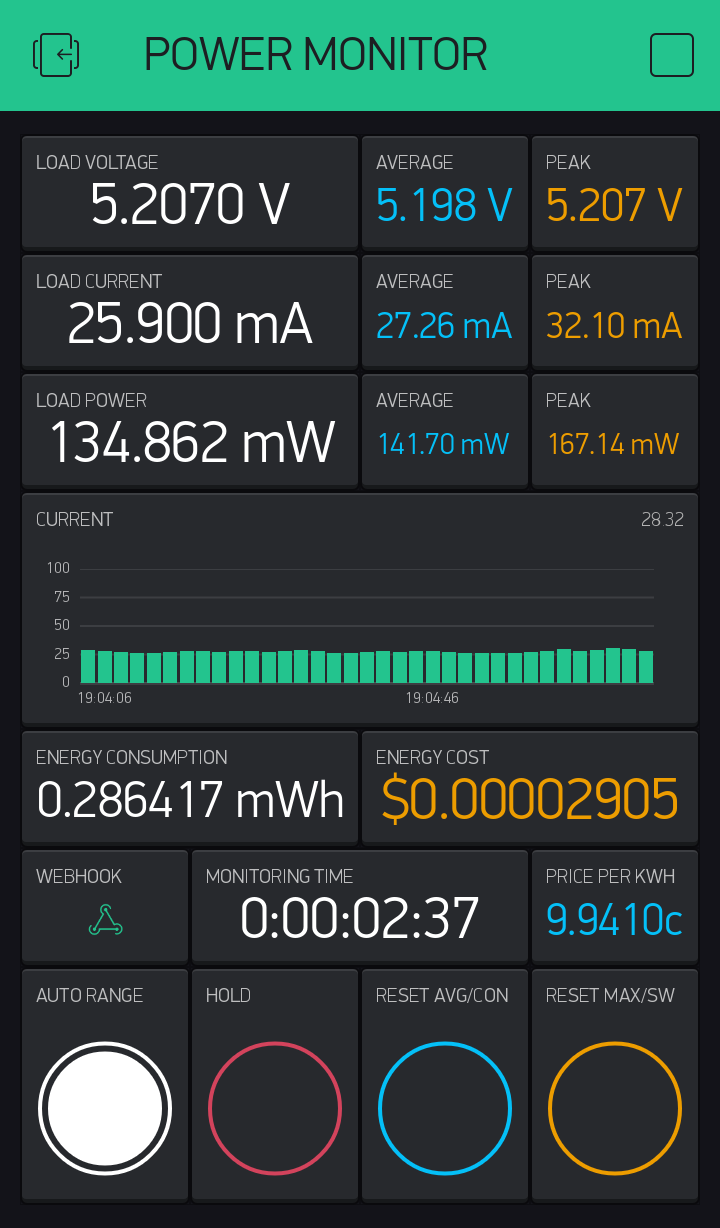
Peak value and Average value for Voltages, Current & Power
Reset buttons for the above new values. This is so you can get accurate averages etc just handy really
Auto-range selection button which is on by default.
Fixed Energy calculations so they are more accurate.
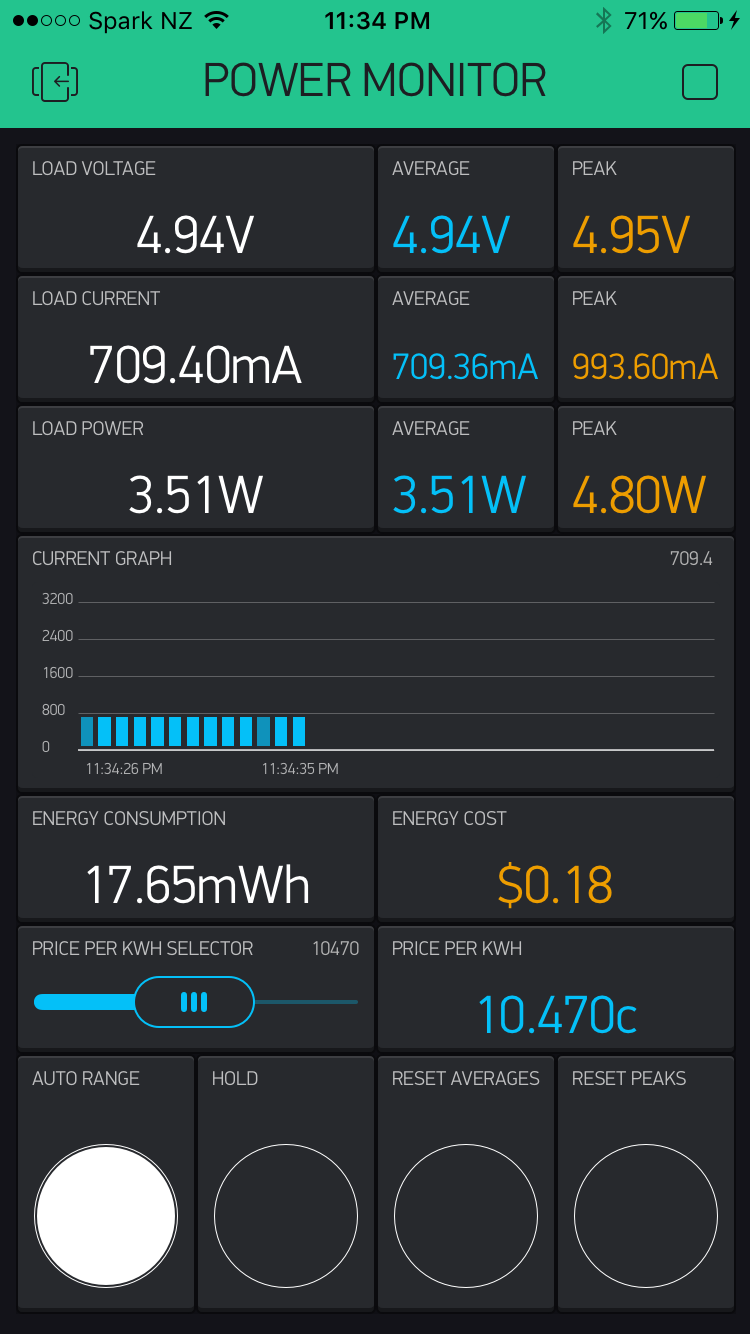
Added a Price Per kWh slider to the Eneergy consumption section so you can calulate how much your device costs you. I am currently trying to pull my Spot Power Rate from my power company’s API so I will probably remove the slider later and have the price update every minute from the API.
When no load is connected it was showing 1.07V & 1.4mA. Now it shows 0.00V / 0mA
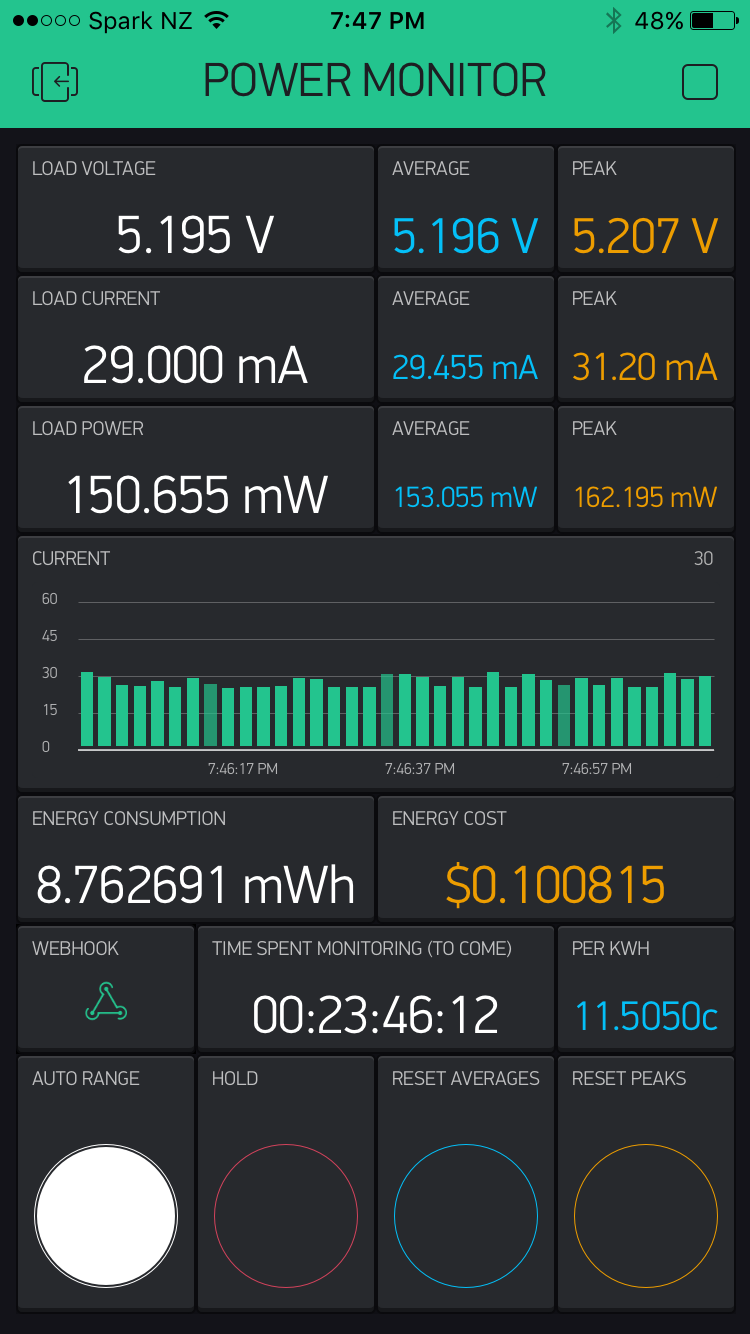
Consumption area now pulls current the latest rate using a webhook. I have set up a simple GET on an API I set up on a local server.
Energy cost and total consumption now work on 6 decimal places for more accurate readings on low powered devices.
To come:
Average 5-10 samples instead of 2 to help stabilize the averages.
Keep energy cost from previous rates after it updates. Basically right now when the rate changes, it just multiplies the energyPrice and energy. I will change it so that it keeps the cost that has already been added to the total and the rate only affects what is added each second.
I want to lower the number of virtualWrite’s made each second as I have noticed my ESP start to disconnect from over working. I will seperate the updates in to a sequence so that the values are updated over 1000ms unstead of all at once at the start.
Some sort of timer or stop watch so you know how long you have been monitoring the device.
Very nice @Jamin
Can you please provide more details on the power companies API?
I see you have a separate server running node.js to pull down the API data at 10 second intervals. Is it not possible to use Blynk’s Webhook widget to obtain the data directly to your MCU?
Does the energy price actually change very often as a 10s loop seems very frequent?
My provider is Flick Electric. They are quiet different from normal power companies because they charge on a spot rate which changes depending on power demand of the local community and country.
Cheap at night and expensive during day and evenings basically.
Watch the video below for a brief look at NZ humor… hahh
I emailed customer service the other day asking for acess to the API but was told it is officailly un-available.
But a smart person from Wellington, NZ has created an API and put it on Github!
I have a Diskstation (basically a linux server) in my closet. It runs my local Blynk server etc.
I installed Nodejs 4.2 via the Synology Package Center and then connected via SSH.
I followed some commands about how to load npm node_modules, and then how to create and run .js scripts on the server side.
I still havn’t masterd it as I have to reload it manually for it to update the price via the API… looking at the “reload” node_module but its confusing. (if anyone know s node.js and wants to help please msg me!)
I am! I copied the GET example provided by Blynk. Workes a treat!
Yup! I noticed it changes randomly… its on-demand so could change at any time.
I was thinking direct from MCU to Energy company without the API call to your node.js server.
Looking at the GitHub I see the API requires JSON web tokens for authentication etc so borrowing the javascript interface was probably the right choice for you.
Thanks for posting your script. You are a Blynk Guru, you just won that title. All my life I have been searching how to format the output using “Blynk.virtualWrite” to two decimal places using the “Value Display S” widget, I posted a question, never got a reply, no even from the developers, I guess they are too busy.
Anyway, I found the solution from your script: (1,String(loadvoltageMax, 3) + String(" V") Bingo! It works beautifully.
Hi @Jamin…thanks for detailed explanation I am new to blynk and trying to implement this project on my home network. I uploaded code onto esp8266 and app says that device is offline.
I am using this code for wifi_credentials.h library
Hi @Jamin,
I have been playing with your project and the INA219 sensor, thanks for sharing this amazing project!
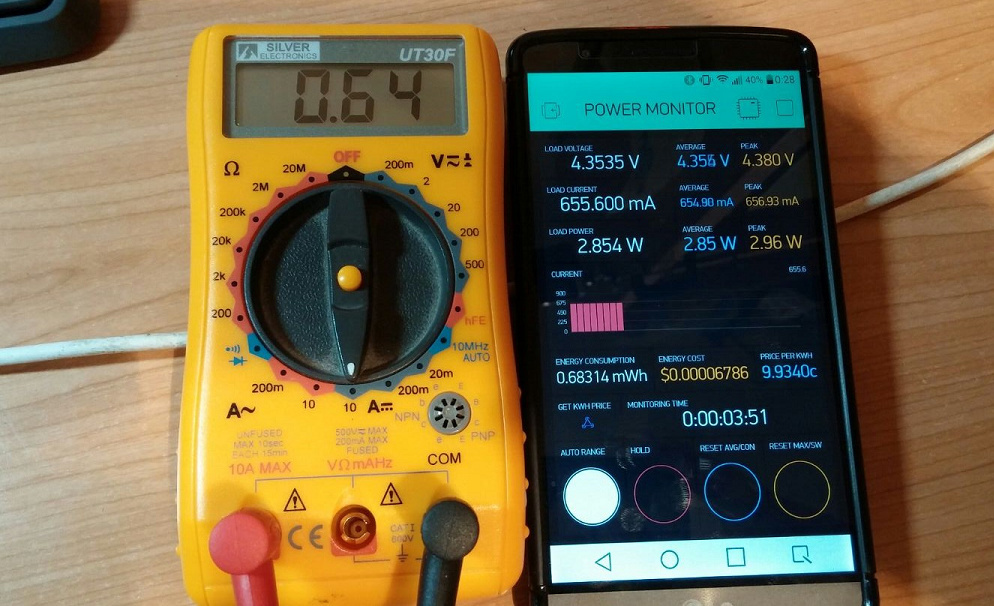
The results using my tester and the INA219 are pretty similar, see below: