Do not use delay()… between the ESP connection process and Blynks own heartbeat loop, any delay over a few fractions of a second will cause disconnects and timeouts.
@Abdullah_Anwar Please format your code and read up on Simple Timer or we may be unwilling to continue further assistance…
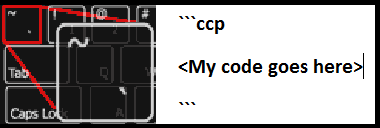
Well you clearly know how to paste your code in your posts… just add the three backtick characters and the letters ccp in front of it, then three more backticks at the end… just like the picture above.
#define BLYNK_PRINT Serial    // Comment this out to disable prints and save space
#include <ESP8266WiFi.h>
#include <BlynkSimpleEsp8266.h>

// You should get Auth Token in the Blynk App.
// Go to the Project Settings (nut icon).
char auth[] = "";

void setup()
{
  digitalWrite(D7, HIGH); //GPIO13
  pinMode(D7, OUTPUT);       // Pin connected to the Relay
  Serial.begin(9600);
  Blynk.begin(auth, "", "");
}

BLYNK_WRITE(V7)
{
  if (param.asInt() == 1 )
  {
   digitalWrite(D7, HIGH); //GPIO13
   delay(3000);
  }
  else
  {digitalWrite(D7, LOW);

     }

 }


void loop()
{
  Blynk.run();
  yield();
}
Correct principle, wrong key for the backtick (it looks like you used periods, a backtick is like a reversed comma)… look at the picture and find the same looking key somewhere on your keyboard. Depending on the language layout of your keyboard, the backtick may be located elsewhere then the upper left.
Or just try copy and pasting these three backticks here like @Jamin suggested —> ```
@Abdullah_Anwar Looks better… and thanks for going back and editing all the previous ones as well Not many do that.
Now as for your timing issue… @Jamin posted a good example of triggering relays for a set time in this post here [SOLVED] Triggered cycle counter Check it out for ideas on how to work Simple Timer into your code.
Here is my code i did like the example but it does not work am i missing something? @Gunner@Jamin
#define BLYNK_PRINT Serial    // Comment this out to disable prints and save space
#include <ESP8266WiFi.h>
#include <BlynkSimpleEsp8266.h>
#include <SimpleTimer.h>
SimpleTimer timer;


// You should get Auth Token in the Blynk App.
// Go to the Project Settings (nut icon).
char auth[] = "";


void setup()
{
  Serial.begin(115200);
  Blynk.begin(auth, "", "");
  pinMode(2, OUTPUT);
  pinMode(13, OUTPUT);
}
void actionRelays(){
  relay1_ON(); // turn on relay1
  timer.setTimeout(2000, relay2_ON); // delay 2sec then turn on relay2
  timer.setTimeout(15000, relays_OFF); // delay 15sec from first action and turn off both relays
}

void relay1_ON(){
  digitalWrite(2,HIGH); // turn on relay1
  Blynk.virtualWrite(V10, 255); // turn on an LED widget (optional)
}

void relay2_ON(){
  digitalWrite(13,HIGH); // turn on relay2
  Blynk.virtualWrite(V20, 255); // turn on an LED widget (optional)
}

void relays_OFF(){
  digitalWrite(2,LOW); // turn off relay1
  digitalWrite(13,LOW); // turn off relay2
  Blynk.virtualWrite(V10, 0); // turn off an LED widget (optional)
  Blynk.virtualWrite(V20, 0); // turn off an LED widget (optional)
}

BLYNK_WRITE(V7)
{
  if (param.asInt() == 1 )
  {
   actionRelays();
  }
  else
  {digitalWrite(13, LOW);

     }
}
void loop()
{
  Blynk.run();
  }
Thank you guys for the great support @Jamin@Gunner the code is working like charm
i will post it here in case somebody need it
/**************************************************************
   Blynk is a platform with iOS and Android apps to control
   Arduino, Raspberry Pi and the likes over the Internet.
   You can easily build graphic interfaces for all your
   projects by simply dragging and dropping widgets.

     Downloads, docs, tutorials: http://www.blynk.cc
     Blynk community:            http://community.blynk.cc
     Social networks:            http://www.fb.com/blynkapp
                                 http://twitter.com/blynk_app

   Blynk library is licensed under MIT license
   This example code is in public domain.

 **************************************************************
   This example runs directly on ESP8266 chip.

   You need to install this for ESP8266 development:
     https://github.com/esp8266/Arduino

   Please be sure to select the right ESP8266 module
   in the Tools -> Board menu!

   Change WiFi ssid, pass, and Blynk auth token to run :)

 **************************************************************/

#define BLYNK_PRINT Serial    // Comment this out to disable prints and save space
#include <ESP8266WiFi.h>
#include <BlynkSimpleEsp8266.h>
#include <SimpleTimer.h>
SimpleTimer timer;

#include <SPI.h>
#include <Wire.h>
#include <Adafruit_GFX.h>
#include <Adafruit_SSD1306.h>
#define SSD1306_LCDHEIGHT 64

#define OLED_RESET LED_BUILTIN  //4
Adafruit_SSD1306 display(OLED_RESET);

#if (SSD1306_LCDHEIGHT != 64)
#error("Height incorrect, please fix Adafruit_SSD1306.h!");
#endif

// You should get Auth Token in the Blynk App.
// Go to the Project Settings (nut icon).
char auth[] = "blynk authu";

void setup()
{
  display.clearDisplay();
  pinMode(13, OUTPUT);
  Serial.begin(115200);
  Blynk.begin(auth, "ssid name", "pass");
}
void actionRelays()
{
  relay1_ON(); // turn on relay1
  timer.setTimeout(1000, relay2_ON); // delay 2sec then turn on relay2
  sendOLED();
  timer.setTimeout(5000, relays_OFF);
  timer.setTimeout(5000, relays_OFF);// delay 15sec from first action and turn off both relays

  timer.setTimeout(5000, sendOLED);
  timer.setTimeout(5000, screen_clear);
}

void screen_clear()
{
   display.clearDisplay();
  display.display();
  }

void relay1_ON()
{
  digitalWrite(13, LOW); // turn on relay1
  Blynk.virtualWrite(V10, 255); // turn on an LED widget (optional)
}

void relay2_ON()
{
  digitalWrite(13, HIGH); // turn on relay2
  Blynk.virtualWrite(V20, 255); // turn on an LED widget (optional)
}
void relays_OFF()
{
  digitalWrite(13, LOW); // turn off relay2
  Blynk.virtualWrite(V20, 0); // turn off an LED widget (optional)
}


void sendOLED()
{

  display.begin(SSD1306_SWITCHCAPVCC, 0x3C);
  display.clearDisplay();
  display.display();

  display.setTextSize(1);
  display.setTextColor(WHITE);
  display.setCursor(0, 0);
  display.println("Hello from:");
  display.print("Door is Open ");
  display.display();
  display.startscrollright(0x00, 0x0F);


}

BLYNK_WRITE(V7)
{
  if (param.asInt() == 1 )
  {
    actionRelays();
    // oled();
    // sendOLED();
  }
}


void loop()
{
  Blynk.run();
  timer.run();
  display.clearDisplay();
}
Thanks for sharing, I’m using the same and would like to know if its possible to add variable for the delay?
timer.setTimeout(5000, relays_OFF);// delay 15sec from first action and turn off both relays
I’d like to use the slider widget attached to V0 to take a time input in minutes converted to seconds for user by the timer
BLYNK_WRITE(V0){   // add a slider on V0 range 0 to 30 (minutes)
  Countdown = param.asInt();  // set variable as Slider value
  Serial.print("V0 Slider value is: ");
  Serial.println(Countdown);
  CountdownValue=(Countdown*60000);
  Serial.print("CountdownValue will be: ");
  Serial.println(CountdownValue);
BLYNK_WRITE(V0){   // add a slider on V0 range 0 to 30 (minutes)
  long CountdownValue = param.asInt() * 60000;  // take slider input and times by 60k to get millisecs
  Serial.print("V0 Slider value in mins: ");
  Serial.println(param.asInt());
  Serial.print("V0 Slider value in seconds: ");
  Serial.println(CountdownValue / 1000);
  Serial.print("Timer value in millisecs will be: ");
  Serial.println(CountdownValue);
  yourCustomTimer = timer.setTimout(CountdownValue, yourFunctionHere); // do you normal simpleTimer setup here using the same ID = yourCustomTimer
 Not many do that.