Hi Everyone,
I have just completed my Garage Monitoring project based on http://community.blynk.cc/users/ITAlex project with some mods added basically all works fine except the sending of the email notification.
If left open during daylight I just get a screen notification door is open which is fine.
I measure the light intensity and if it decreases to a set level then Blynk notifies me via email. This so that If the door is left open and evening is approaching I am notified to the fact via email.
My problem is that once the low light with door open condition is met an email is sent it OK however it then goes off line and I cannot close the door via Blynk button it just loops back again and send another email, this keeps looping until I manually close the door.
Can someone please get me as I am up against a wall and don’t know how to get over it. For the rest all works OK it is just the emailing side that I cannot solve.
Here is the portion of the code that handles this.
// ============={ Garage Magnetic SW Monitoring Input ==================
void garageMagSensor ()
{

//===========  Measure light level and send data
      float sensor_reading = analogRead(A0);
      light = (int)(sensor_reading/1024*100);
      Blynk.virtualWrite(14, light); //Write LDR value to V14
//============ Display Data
      Serial.println();
      Serial.print("Light Intensity ");
      Serial.print(light);
      Serial.print(" %");
// ============ End of Measuring light level
     int garageSensorSW = digitalRead(4); // GPIO4
  if (garageSensorSW == LOW) // Door is Closed
  {
     Blynk.virtualWrite(3, "CLOSED");
     lcd.print(0, 0, "GARAGE IS CLOSED"); // LCD print, column 0, row 0.

  }
  else if ((light<=30) && (garageSensorSW != LOW)) // Door is open at evening
  {
     Blynk.virtualWrite(3, "IS OPEN");
     lcd.print(0, 0, "Low light OPEN  "); // LCD print, column 0, row 0
     Blynk.email("myemail@gmail.com", "GARAGE DOOR OPEN!", "GARAGE door has been left opened.");
  }
  else
  {
     Blynk.virtualWrite(3, "IS OPEN");
     lcd.print(0, 0, "GARAGE IS OPEN  "); // LCD print, column 0, row 0
  }
}
// =============={ End of Garage Magnetic SW Monitoring }==================

// ==============( Void Loop  ) ====================================
void loop()
{
    Blynk.run();
    timer.run();
    garageMagSensor();
}
Your whole IF(), ELSE IF(), ELSE() loop (contained in the garageMagSensor() Function - which is also looping) is continually running, but you probably only realize it once it gets to the email qualifications… your loop has no way out.
Perhaps limit the function loop to just sensor reading, perhaps using something like a SwitchCase. Then once a case is met, it switches to a task, typically another DoStuff loop(), that also toggles a flag or counter so that it stops repeating the message unless it gets an acknowledgment, or a time-frame has passed without an acknowledgment - in which case, repeat msg and wait again (or it gives up and closes the door itself )
Hi Guys
I am really in need of some help as at the moment I cannot see the wood for the trees with my garage door opener.
I have got it working OK however I added a LDR to monitor the door if left open at night (this has already happened thus the addition of the LDR).
However this is where my problem is. A Blynk API call for NOTIFICATION pushing works but no the problem is that I cannot easily close the door as the system goes continuously on and off of line while the light is below the set value and the door is open, to get it close I have to keep trying to close it until I catch it at the right moment when on line again.
Can someone please get me out of my misery with this I just cannot get this to work with low light been struggling for many days without any success.
/*   ***********************************************
          Garage Door Opener - Monitoring
          Adapted from Alex Rodriguez project
     ***********************************************
*/
#define BLYNK_DEBUG
#define BLYNK_PRINT Serial
#include <ArduinoOTA.h>
#include <ESP8266WiFi.h>
#include <BlynkSimpleEsp8266.h>
#include <ESP8266mDNS.h>

char auth[] = "xxxxxxxxxxxxxxxxxxxxxxxxxxxxxxxxxxx";
char ssid[] = "xxxxxxxxx";
char pass[] = "xxxxxxxxx";

WidgetLED led1(V6);
WidgetLED led2(V9);
WidgetLCD lcd(V10);


int inPinVal ; // Virtual Pin Input
int LDR_value = 0;
int Min_light = 30;

void setup()
{
  WiFi.mode(WIFI_STA);
  Blynk.begin(auth, ssid, pass);
  while (Blynk.connect() == false) {}
  //ArduinoOTA.setHostname("xxxxxxx"); // OPTIONAL
  ArduinoOTA.begin();

  pinMode(4, INPUT_PULLUP);  // Garage Door Magnetic Sensor
  pinMode(12, OUTPUT);       // Pin Connected to the Garage manual pin to ground
  Serial.begin(115200);
}

// ---------[ Widget Button using  virtual pin # 7 ]--------------------

BLYNK_WRITE(V7)
{
  if (param.asInt() == 0)
  {
    digitalWrite(12, LOW); // Relay off
  }
  else
  {
    digitalWrite(12, HIGH); //Pulse & Hold relay
    delay(1000); // Hold Relay on for 1 sec to prevent bounce
    digitalWrite(12, LOW); //Release relay
  }
}
// =================={ Virtual LEDs Garage Magnetic SW Monitoring }=========
void checkPin()
{
  if (digitalRead(4)) // GPIO4
  {
    led1.off();
    led2.on();

  } else {
    led1.on();
    led2.on();
  }
}
void LDR() {
  int LDRpin =  analogRead(A0);
  float sensor_reading = analogRead(A0);
  LDR_value = (int)(sensor_reading / 1024 * 100);
  Blynk.virtualWrite(14, LDR_value); //Write LDR value to V14
  Serial.begin(115200);

  //============ Display Light Data
  if (LDR_value <= Min_light)
  {
    Serial.println();
    Serial.print("Light Low ");
    Serial.print(LDR_value);
    Serial.print(" %");
  }

  Serial.println();
  Serial.print("Light Intensity ");
  Serial.print(LDR_value);
  Serial.print(" %");
  //===========  End of Measure light level and send data
}
// ========{ Garage Magnetic Switch Monitoring Input }==================
void garageMagSensor ()
{
  int garageSensorSW = digitalRead(4); // GPIO4
  if (garageSensorSW == LOW)
  {
    Blynk.virtualWrite(1, "CLOSED");
    lcd.print(0, 0, "GARAGE IS CLOSED"); // LCD print, column 1, row 0.
    lcd.print(0, 1, "                ");
  }

  if ((LDR_value < Min_light) && (garageSensorSW != LOW))
  {
    Blynk.virtualWrite(1, "OPEN");
    lcd.print(0, 0, "  GARAGE  OPEN  "); // LCD print, column 1, row 0
    lcd.print(0, 1, "    Low Light   ");
    //Blynk API call for NOTIFICATION pushing
    Blynk.notify("Garage Door Open!");
    //    Blynk.email("xxxxxxxxx@gmail.com", "GARAGE DOOR OPEN!", "Garage door left opened.");
  }
  else if ((LDR_value > Min_light) && (garageSensorSW == HIGH))
  {
    Blynk.virtualWrite(1, "OPEN");
    lcd.print(0, 0, " GARAGE IS OPEN "); // LCD print, column 1, row 0
    lcd.print(0, 1, "                ");
  }
}
// ==============( Void Loop  ) ====================================
void loop()
{
  LDR();
  ArduinoOTA.handle();
  garageMagSensor();
  checkPin();
  Blynk.run();
  yield();
}
Hello again… it looks like you have been dealing with this for longer than a few days
I merged your new request back into your original for continuity.
It looks like you are still dealing with the original issue… too much running in the void loop()
You should be able to move most of your separate functions into timed functions, instead of sitting in the main loop where they will try to run hundreds of times a second… and cause the disconnections.
BlynkTimer is the same as the widely used SimpleTimer library, in that it works more elegantly than manually manipulating millis() and much better for Blynk then delay(). Also, it is NOT dependent on a connection to a Blynk Server, and also fixes some minor issues with the original library.
A typical Interval Timer layout includes a definition, timer setup (pointing to a function) and a timer call in the void loop():
BlynkTimer Timer; // Sets up a timer object named Timer (could be any name)

Timer.setInterval(1000L, garageMagSensor);  // Goes in Setup() and will call the void garageMagSensor() every 1000 milis (1 second - adjust to your needs).  Blynk Timer allows up to 16 of these same object named timers pointing to differing functions

void garageMagSensor()
{
// Put all your sensor stuff here
}

void loop()
{
Blynk.run();
Timer.run();  // This goes in the void loop() so the BlynkTimer library can run.
}
Hi Gunner.
Thank you so much for the help got it working just fine.
I would like to have the unit indicate that the door has left the open/close position and have a gauge widget show the progress
Is it possible and could you help?
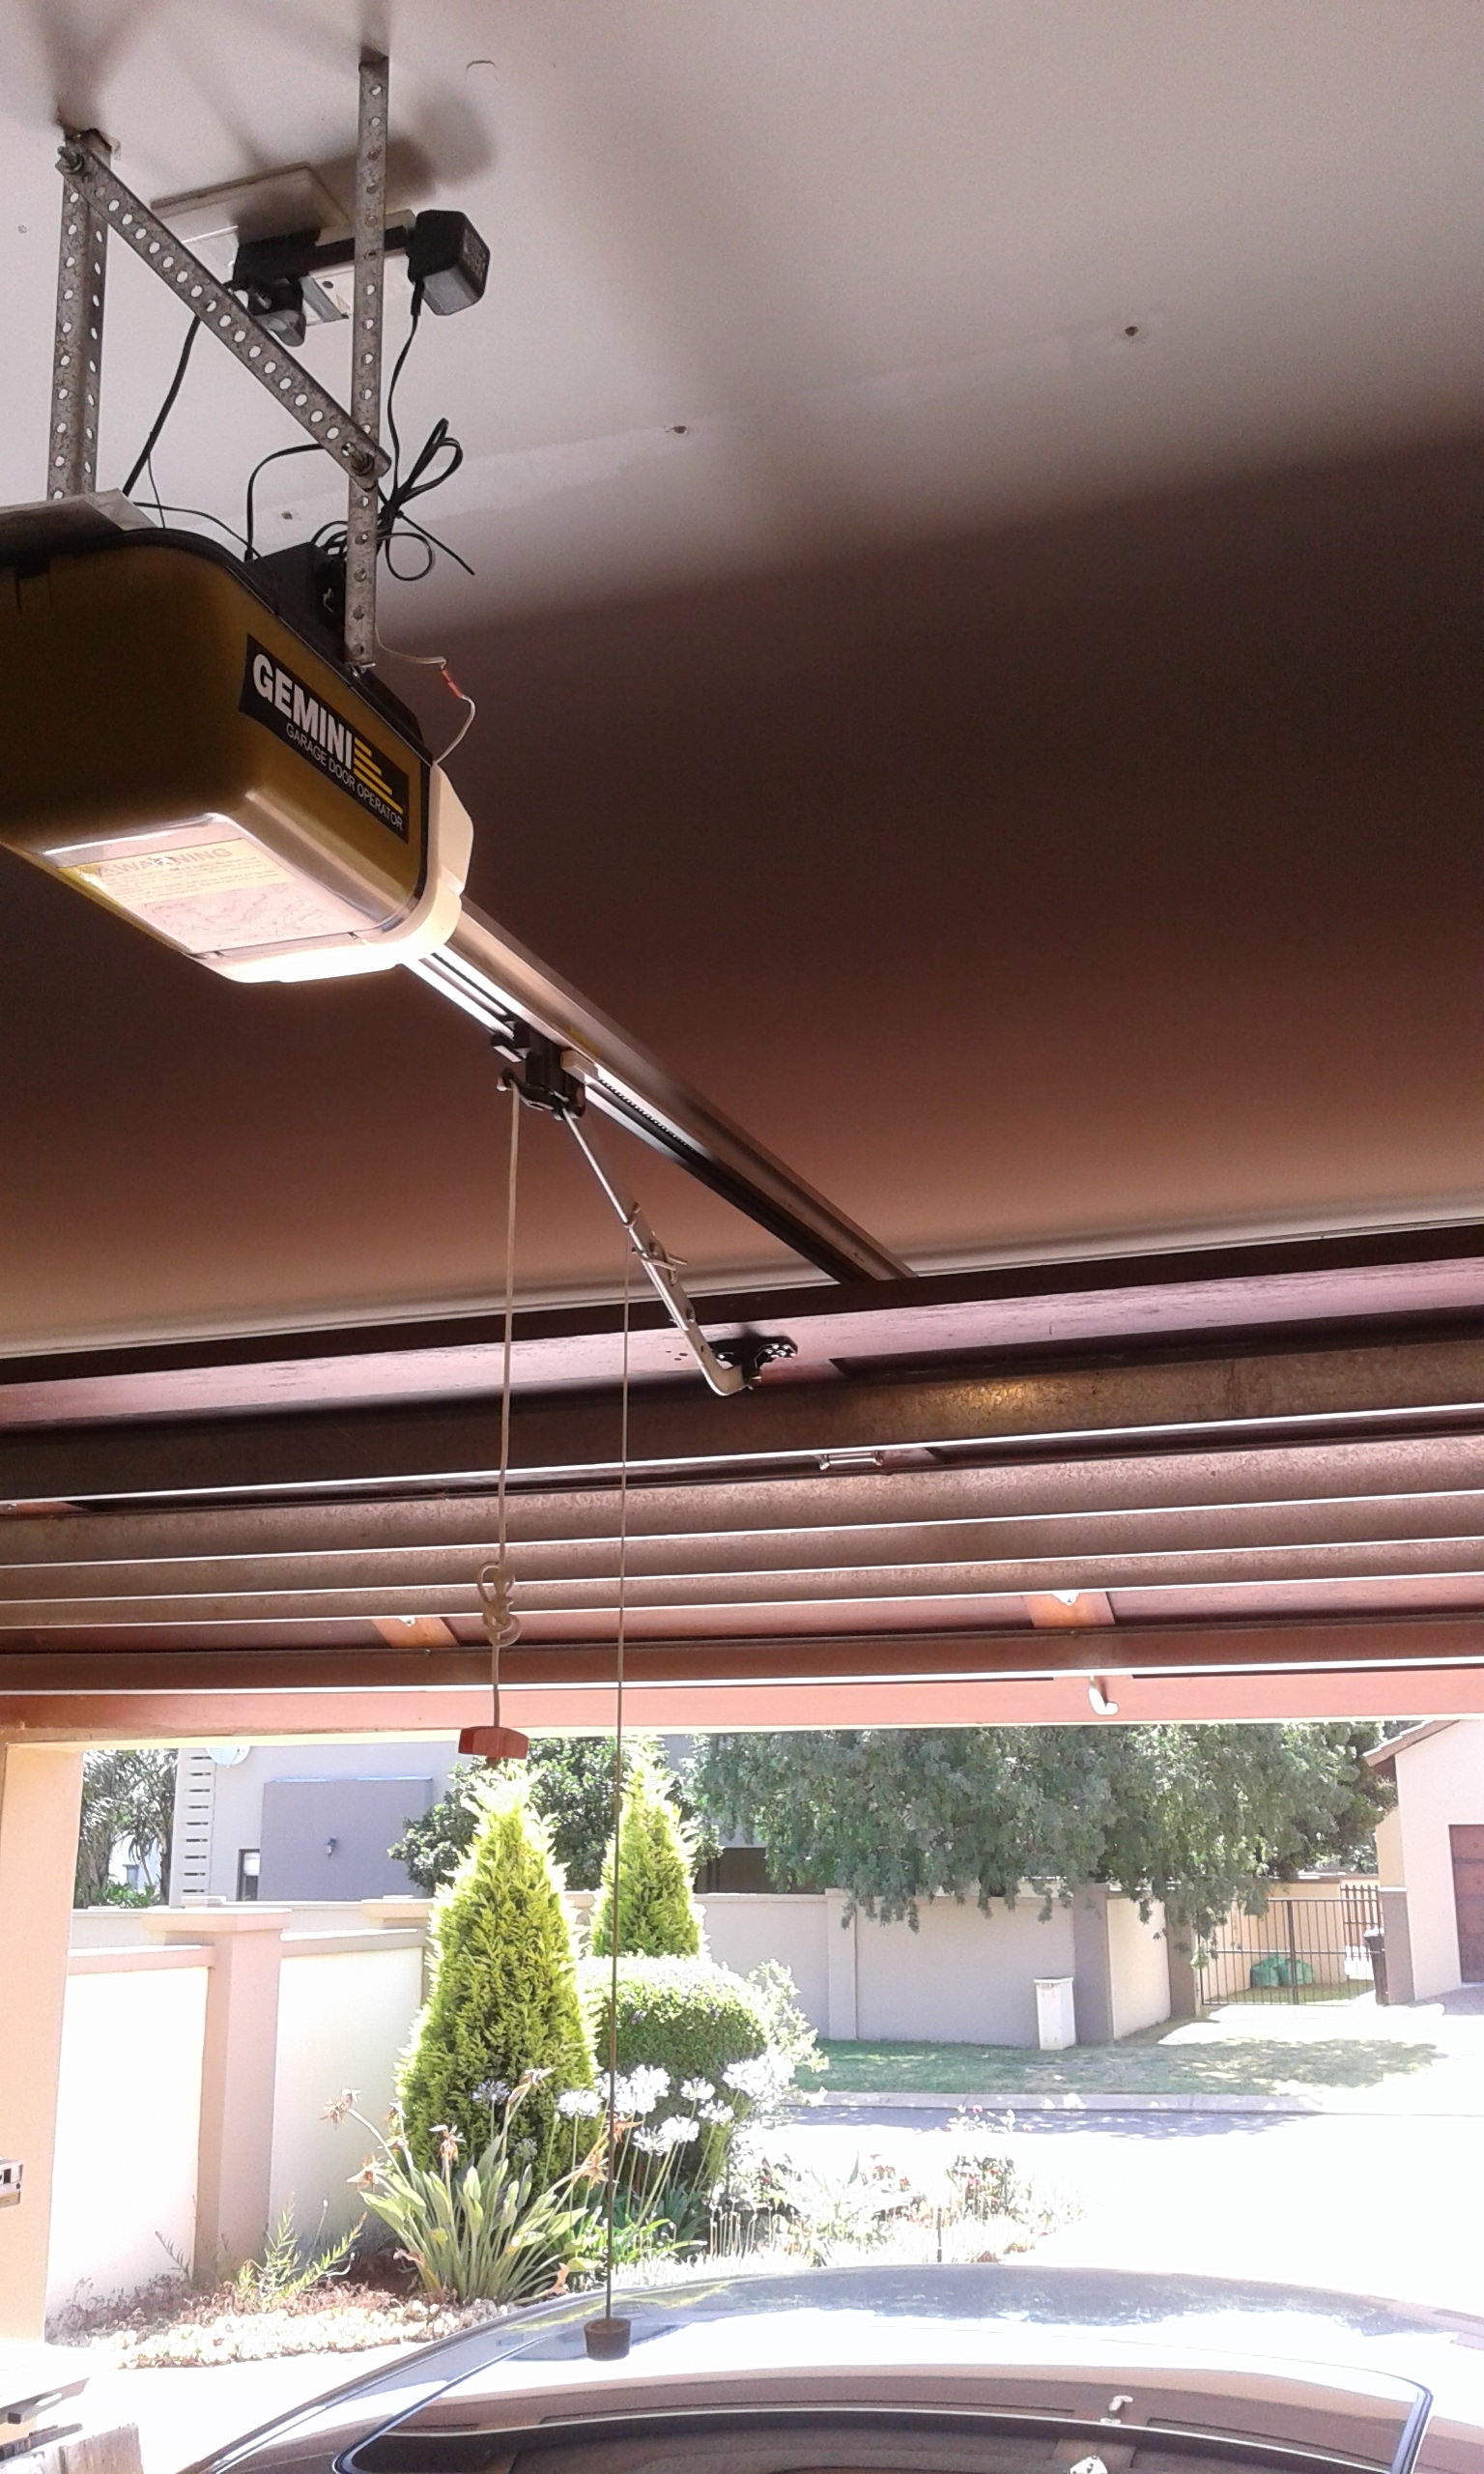
It is a double door unit opens and closes via a chain system and a torsion spring loader bar. The door Wemos Closer unit can be seen parked above the motor unit
Off the top-o-me noggin, I suggest something like a magnet on the traveling lever attachment and, depending on available GPIO pins, one HALL effect sensor each, to count the passing… 3 or 4 sensors spaced along the chain guide will give you the approximate door position in 1/3 or 1/4 increments. Then some logic coding to determine gauge position.
Even better (less pins, but possibly trickier wiring for the sensor) you could go the opposite way and have a single traveling HALL sensor with even more magnets spaced out along the way and use code to effectively make up a linear encoder. The more magnets, the more precision of door position.
One way to have the sensor wiring would be a coiled wire… (old style corded phone handset cord), mounted centrally on the ceiling above the track, and running to the sensor on that traveling lever attachment.
I am stumped !!! the above system was and still is operating perfectly after adding the above suggestions.
However I wanted to do some changes to the coding (neaten up coding) but prior to doing anything I just did a compile to check if all was still OK but BAM now all of a sudden does not compile generating the the following error. I did a completer reinstall of the Arduino 1.68 version but error still persists.
R-and-D_Garage-Opener-Work-in-progress:13: error: 'BlynkTimer' does not name a type

 BlynkTimer Timer; // Sets up a timer object named Timer (could be any name)

 ^

C:\Users\doart\OneDrive\Arduino\001 Wemos D1 Sketches\Sketches_Work_in_Progress\R-and-D_Garage-Opener-Work-in-progress\R-and-D_Garage-Opener-Work-in-progress.ino: In function 'void setup()':

R-and-D_Garage-Opener-Work-in-progress:32: error: 'Timer' was not declared in this scope

  Timer.setInterval(2000L, garageMagSensor);

  ^

C:\Users\doart\OneDrive\Arduino\001 Wemos D1 Sketches\Sketches_Work_in_Progress\R-and-D_Garage-Opener-Work-in-progress\R-and-D_Garage-Opener-Work-in-progress.ino: In function 'void loop()':

R-and-D_Garage-Opener-Work-in-progress:133: error: 'Timer' was not declared in this scope

   Timer.run();

   ^

exit status 1
'BlynkTimer' does not name a type
Hi Gunner I did have the latest installed however I decided to go Radical I deleted my complete library folder and installed only the Blynk (v0.4.10) then tried to compile and now it works can only think that there was some thing in my library folder that was corrupt causing the Blynk library files to act this way. many thanks again apologies for the bother.