I will go home n try that in the evening. Let you know my findings. thank you.
Shouldn’t these “ ” be these " " … ?
Example: Shouldn’t this
char ssid[] = “WIFI NAME HERE”;
Look like this
char ssid[] = "WIFI NAME HERE";
Aah. Now I see… yeah, good catch.
Tried this code and it display correct temperature over serial monitor. Now i dont know how to make this code to send data over wifi…i have read the manual in the help section but still at loss at the basics. please help.
int sensorPin = 0;

void setup()
{
 Serial.begin(9600);
}

void loop()
{

 int reading = analogRead(sensorPin);
 // measure the 3.3v with a meter for an accurate value
 //In particular if your Arduino is USB powered
 float voltage = reading * 3.3;
 voltage /= 1024.0;

 // now print out the temperature
 float temperatureC = (voltage - 0.5) * 100;
 Serial.print(temperatureC);
 Serial.println(" degrees C");

 delay(1000);
}
Backticks, not commas for the code formatting ![]()
As for your code… Blynk can’t work with too much stuff in the void loop()… You need to use timers.
Look at this example using a couple of different sensors…
This is easily done using the value display widget. Please pick out the value display widget example from the sketch builder, run it and you will understand how it works. Fairly simple. I’m sure you will then be able to integrate it into your project.
Essentially, you need to write that value to a virtual pin using blynk.virtualWrite call. Viola…The widget on the phone tied to the same virtual pin will display the value.
Hi Mohan,
can you please help on how to modify the code that display data over serial and send to blynk. after you show me i will be able to compare both codes and learn from that. i understand its super easy for you but i have to see an example to learn. thank you.
So perhaps look at the examples? ![]() This is just one of many, including the link I sent you above.
This is just one of many, including the link I sent you above.
thank you. i didnt know about the example sketch generator. what is virtual pin 5? on my wemos d1 mini i dont have any such pin.
All the links for the Documentation, Help Center and Sketch Builder are at the top of this page… you may need to scroll up to see them.
here is a link for that info…
Virtual pins are virtual ![]() and are meant to transfer information between the App and the sketch, not part of the physical GPIO.
and are meant to transfer information between the App and the sketch, not part of the physical GPIO.
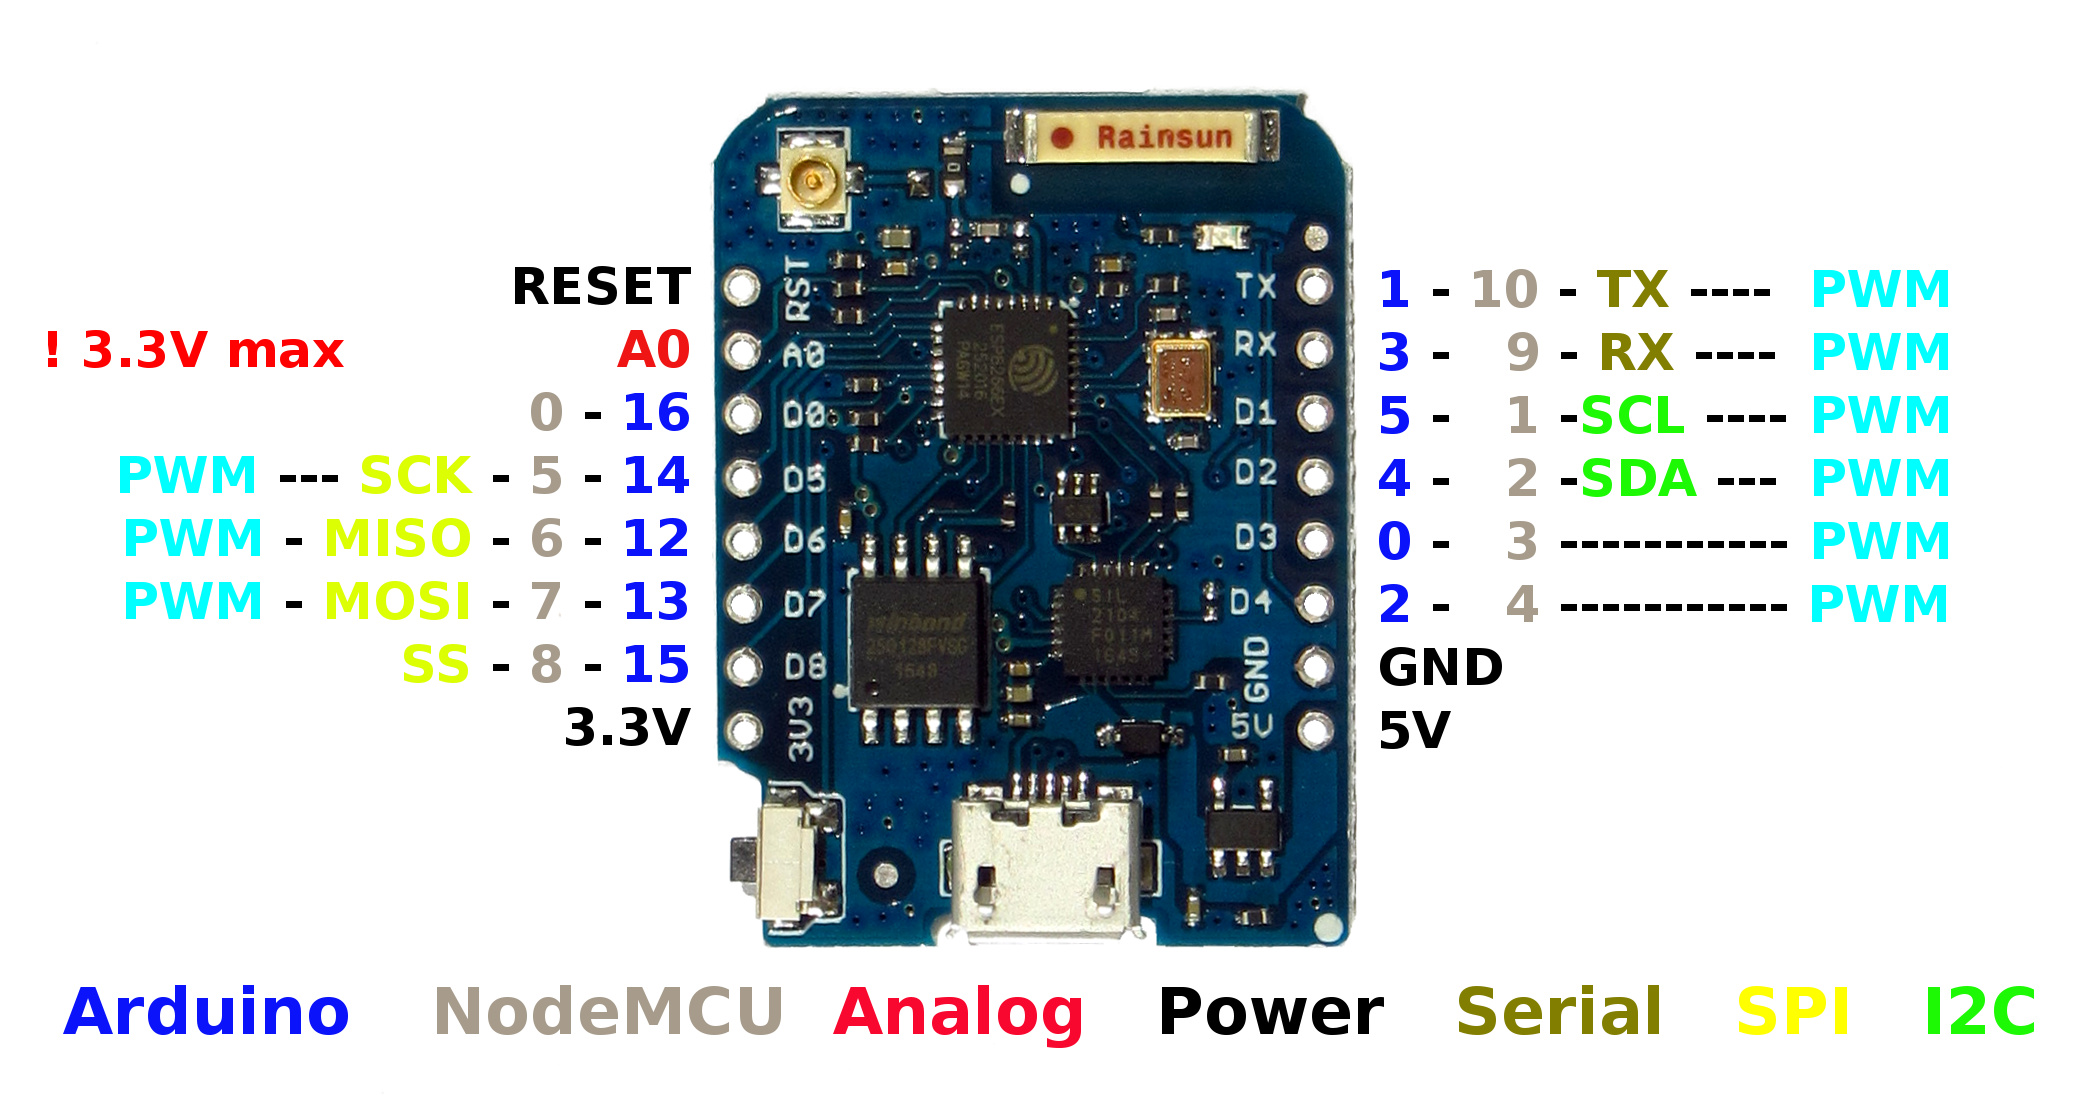
Note, when programming ESP boards with Arduino IDE you do NOT normally use the silkscreened pin designations, rather you would use the Arduino pin designations.
1 Like
#define BLYNK_PRINT Serial

#include <ESP8266WiFi.h>
#include <BlynkSimpleEsp8266.h>

char auth[] = "aec5825e0cee4708b9b293f0d8755fae";

char ssid[] = "YYYY";
char pass[] = "XXXXXXX";

BLYNK_READ(V5) //Blynk app has something on V5
{
  sensorData = analogRead(A0); //reading the sensor on A0
  Blynk.virtualWrite(V5, sensorData); //sending to Blynk
}

void setup()
{
  Serial.begin(9600);
  Blynk.begin(auth, ssid, pass);
}

void loop()
{
  Blynk.run();
}
ok so i tried uploading this code after reviewing some of the examples but the code wont upload. its says sensor data was not declared in this scope.
All variables need to be declared in some way, either within the function where that are used or globally where they can be used throughout the code.
Programming 101…
https://www.arduino.cc/reference/en/language/variables/variable-scope--qualifiers/scope/
#define BLYNK_PRINT Serial

#include <ESP8266WiFi.h>
#include <BlynkSimpleEsp8266.h>

char auth[] = "aec5825e0cee4708b9b293f0d8755fae";

char ssid[] = "xxxx";
char pass[] = "xxxx";

int sensorPin = 0;

BLYNK_READ(V5)
{
 int reading = analogRead(sensorPin);
 float voltage = reading * 3.3;
 voltage /= 1024.0;
 float temperatureC = (voltage - 0.5) * 100;
 Blynk.virtualWrite(V5, temperatureC); //sending to Blynk
}

void setup()
{
  Serial.begin(9600);
  Blynk.begin(auth, ssid, pass);
}

void loop()
{
  Blynk.run();
}
So something is happening. the code uploaded. i am getting values on the app however they not accurate. i remember with serial monitor they were making sense.
Again… Proper method for formatting posted code is as follows…

yes i fixed the formatting now. thanks
You last code looks like it is missing libraries for the sensor?
EDIT, hard to say now… I am unfamiliar with that sensor… however Blynk cannot alter how the sensor works. Only your code and calculations for the sensor and MCU variances matter.
What is the reading frequency you are using in the display widget?
under input
V5 pin, 0 to 1023
reading rate
push